MyRED - Fundamentals
Effective June 24, 2014
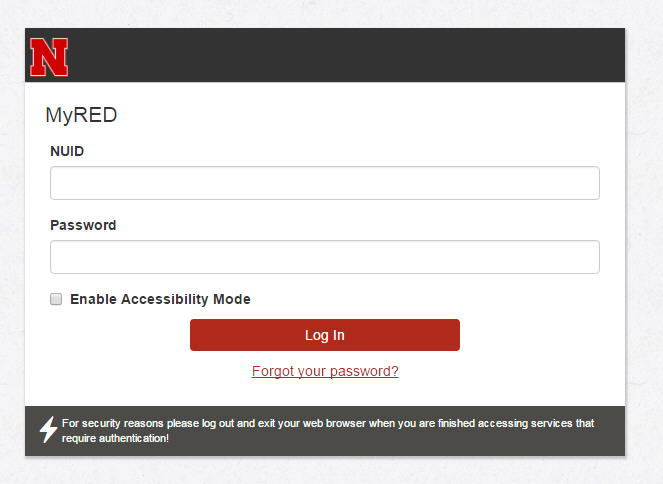
 Signing into MyRED
- Open your web browser.
- Go to www.unl.edu
- Hover over the About section found on the red banner across the top and click Faculty/Staff Services, then click the MyRED link.
- Enter your NU ID number in the NUID: field.
- Enter your password. Use your TrueYou password – the same one that is used to access firefly.
- Click Sign In.
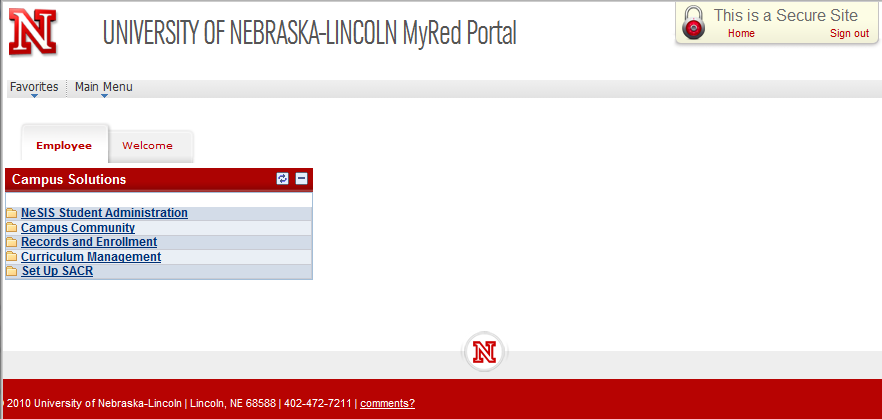
 Navigation Overview
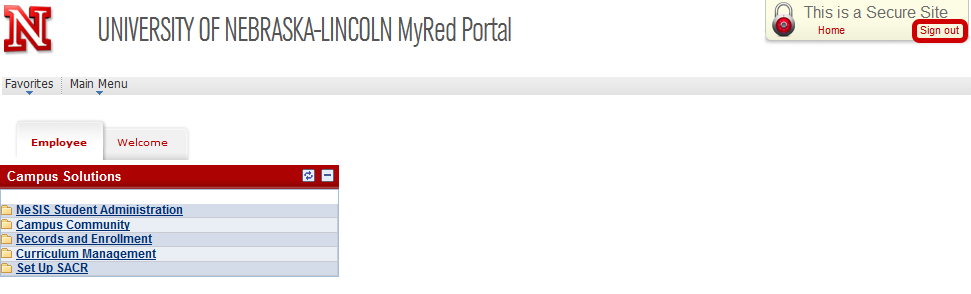
Using the main menu panel on the left, select your first option. Note the menu options across the top. As you click on the menu links across the top, the available options for each folder will open up in a smaller box. You may click on any of the menu links to navigate to other screens. Clicking on the yellow folder icon will load all page options for the selected folder.
The menu item availability under the Employee tab depends on the security access needed to complete your job duties.
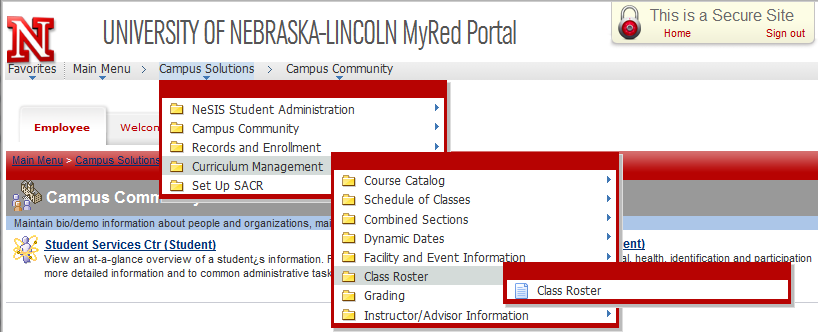
In the example below, the Curriculum Management screen could be found by selecting Curriculum Management from the main menu or by clicking the yellow folder to the left of Curriculum Management under the Campus Solutions tab.
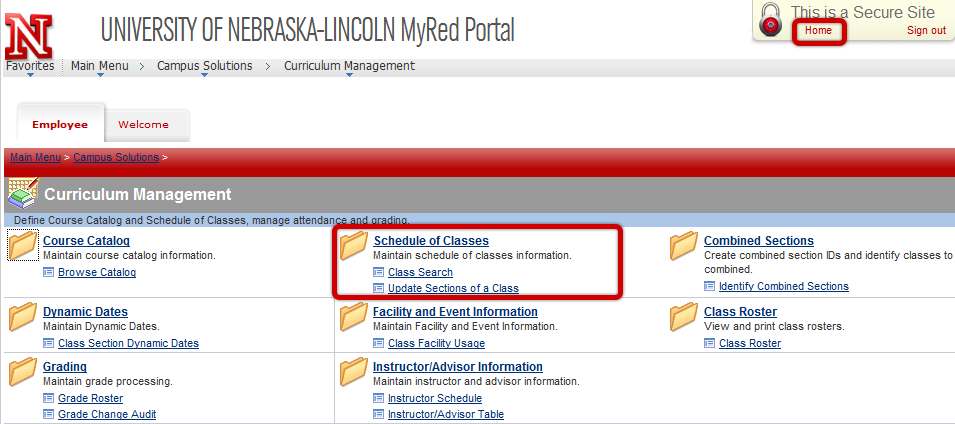
Click on the Home link to return to the MyRED homepage.
After clicking on the Schedule of Classes, you will see additional pages (depending on your security access) within the folder. Click on the links across the top, or the main menu, to go to a page.
 Using Search Pages
When a page is selected from a menu panel, the system will display a Search page. Use the Search page to retrieve the appropriate record/information from the database.
Enter search criteria in the search boxes to narrow down your search results. If you have set up your user preferences, some search criteria will default into the search fields.
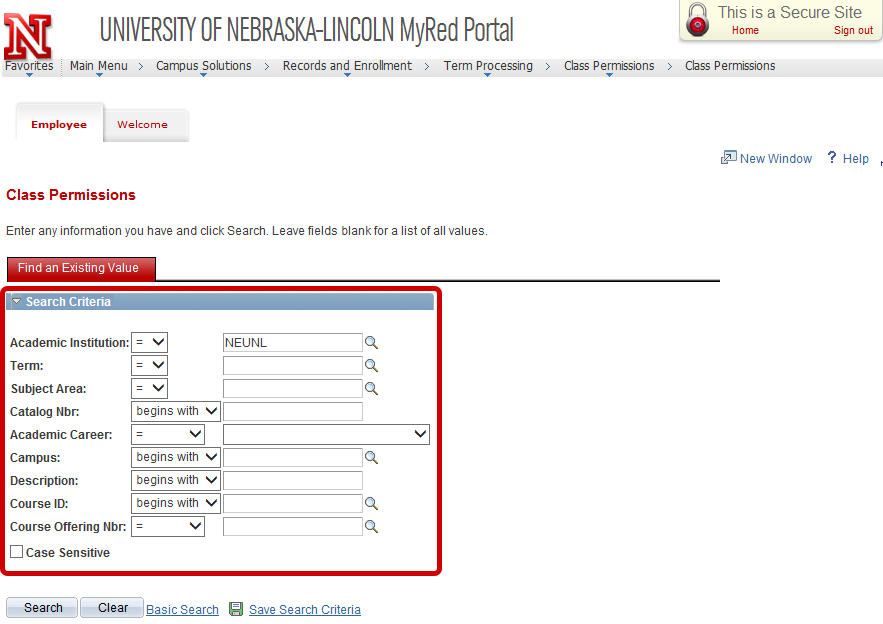
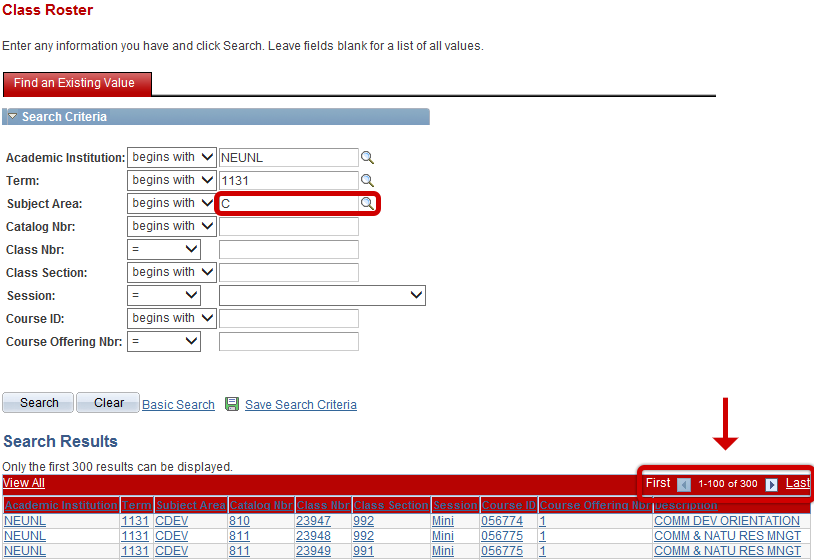
In this search, the Academic Institution, Term code, Subject Area and Catalog Number were entered as search criteria. You may enter as much search criteria as you would like to narrow your search. If you do not like the results of your search, click on the Clear button and re-enter different search criteria.
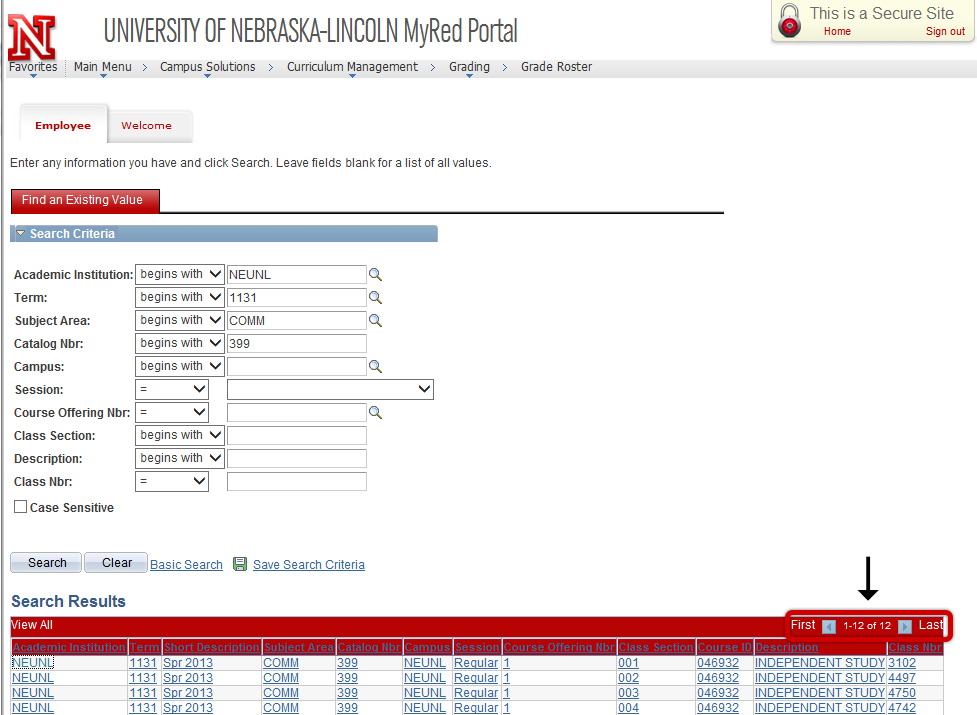
The numbers on top of the search results indicate how many results are retrieved in your search.
 Searching for Students
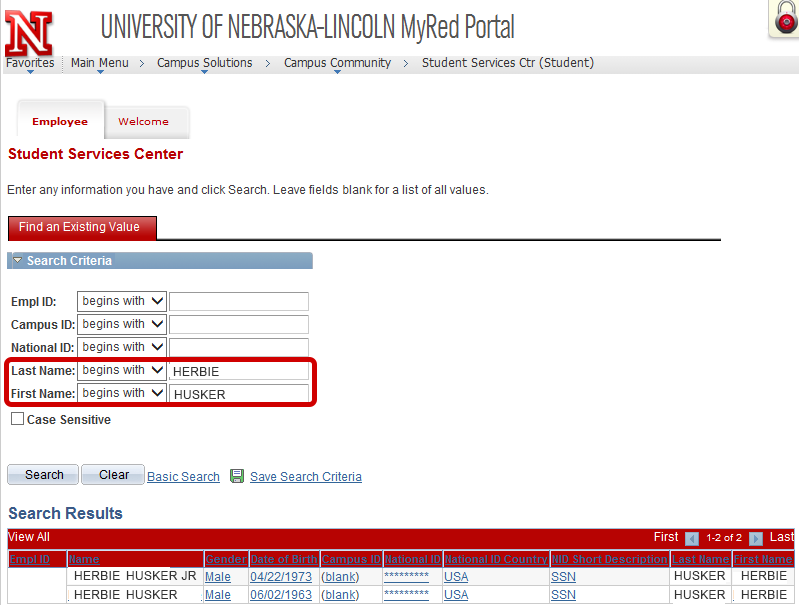
When searching for students, it is best to enter the NU ID number into the Empl ID field. If you do not have the NU ID number, you may search by Last and First Name. Please remember that when you search by name, your search results will return students from all four institutions in the database. Some search results do not indicate which institution the student is associated with.
 Advanced Search
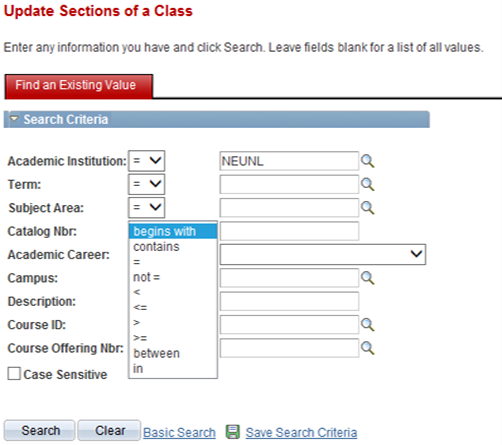
Conditional operators (options in the drop down list box by the field name) are provided on fields for advanced search capabilities. While conditional operators can be useful, caution should be used with them. For instance, entering only the Academic Institution and the Term will result in a slow search with too many results. If you enter very specific search criteria, your search results may not return all that you need.
In this search, the Academic Institution and Term code were used with a conditional operator of Contains in the subject area field. Notice that the search results only display a maximum of 300 results. You will need to refine your search to reduce the number of search results.
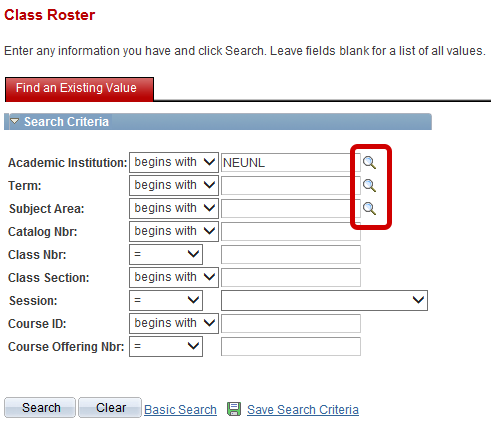
 Lookup Function
The Lookup Function page appears when you click on the Lookup button. MyRED will automatically show all available choices for the field.
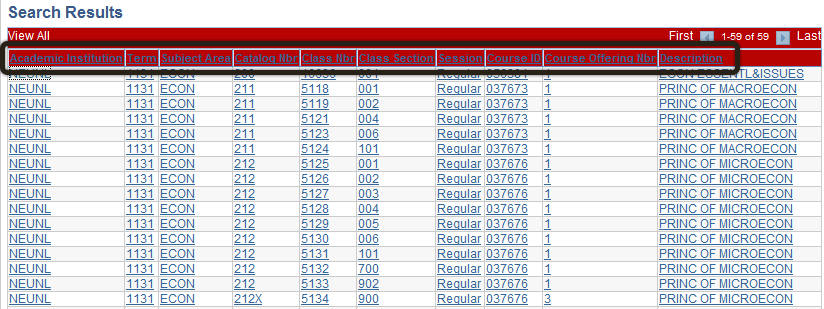
 Sorting Search Results
You may sort search results on any search results page by clicking on the search criteria in the red bar. Click the search criteria twice to reverse the sort order.
Click any of the descriptions to change the sort order of your search result.
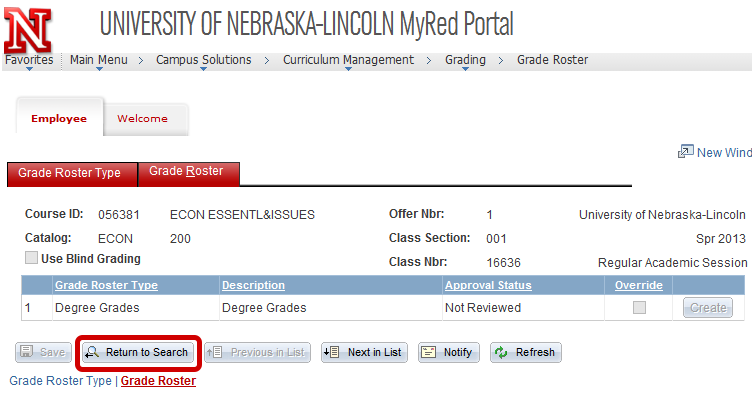
 Search Results Options
When multiple search results are returned, you may not know which record you need to view. When you select a record, you can use the buttons at the bottom of the page to Return to Search, view Previous in List, or Next in List.
Use the Return to Search tab to return to your list of search results on the search page. Use the Previous in List or Next in List to scroll through your list of results.
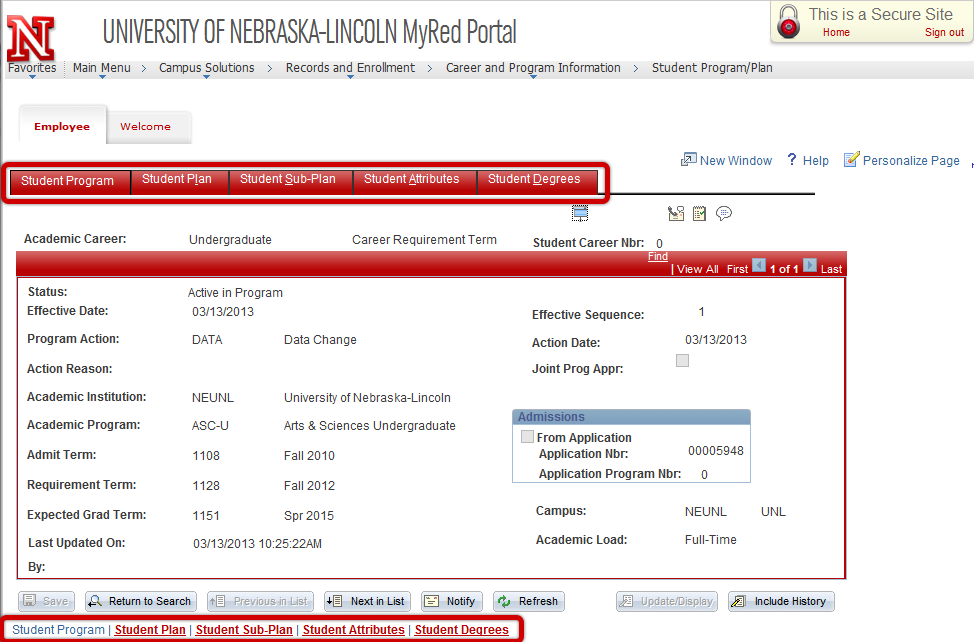
 Viewing Information
Pages categorize all the data within the system and allow access to pre-organized information. A page can also be called a window or a screen. A component is a series of related pages that are used for a particular function. The tabs across the top of the page and red links at the bottom of the page represent components of a particular page. You may navigate through the page by clicking on the individual tabs or the red links at the bottom of the page.
You may click on the tabs across the top of the page or the red links at the bottom of the page to access the different components.
 New Window
The New Window link allows you to open another session of MyRED without logging into the system again. This is helpful when you need to navigate to a new page, but you don’t want to lose any unsaved data on the page you are currently using.

Once you are finished using the new window, use the red X at the top of the page to exit and return to your original MyRED session. If you Sign Out of your new window, you will also sign out of your original window and lose any unsaved data.
 Effective Dating
Effective date is the date on which a table row becomes effective or the date that an action begins. Most tables in MyRED have effective dates. When working with information in the system, you will need to be familiar with the concept of effective dated rows.
To ensure that you are viewing all effective dated rows, you should check the Include History check box on search pages or click on the Include History button at the bottom of the page.
 View All/View One
There are two different ways to view date effective rows—using View All or View One. Each page will detail for you how many rows of information are available. When a record contains multiple rows of information (i.e., changes in the course catalog over time) users have a choice in how to view the rows, by means of the toggle View All/View One. View One shows one row at a time and may be viewed by means of the arrow buttons or first and last row links. View All stacks all records on top of each other, and adds a scroll bar on the right for easy navigation. The most current or future dated row will be at the top. The example below is in View One mode. Note the toggle says “View All”.
Indicates total rows—Use the First/Last link and arrow buttons to view rows.

The following example is in View All mode. Note the toggle now says “View 10”.
Use the Scroll to view multiple rows when in View All mode.

 Saving Transactions
Every time you enter data into MyRED, you must save your work before leaving the page. The button is located at the bottom left side of every page. If you attempt to exit before saving a transaction, you will receive a warning message.

Click on Ok to return to the page and save your transaction or Cancel to exit the page without saving. When your transaction is saved you will see the Saved icon in the upper right hand corner of the page.
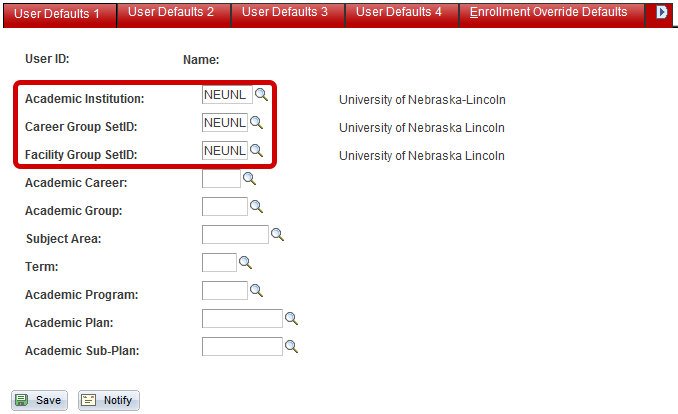
 User Defaults
Navigation: Home > Set Up SACR > User Defaults
You may set User Defaults so that you do not have to enter certain search criteria on every search page. For example, you may set your Institution default to NEUNL so that you never have to enter an institution code on search pages.
Enter “NEUNL” in the Academic Institution box. When you enter an academic institution value, the Career Group Set ID and the Facility Group Set ID default on the User Defaults 1 tab.
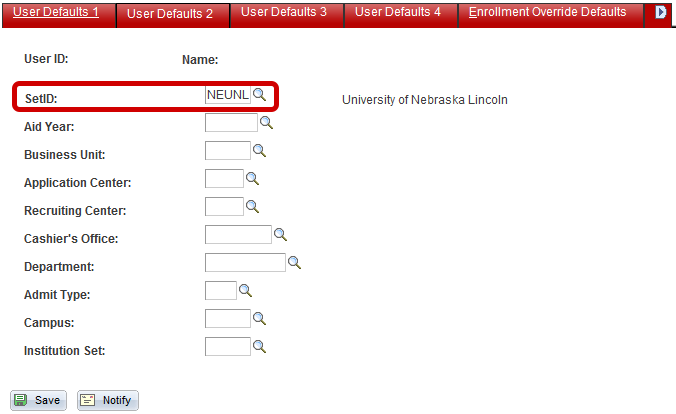
Click on the User Defaults 2 tab and enter “NEUNL” in the SetID box.
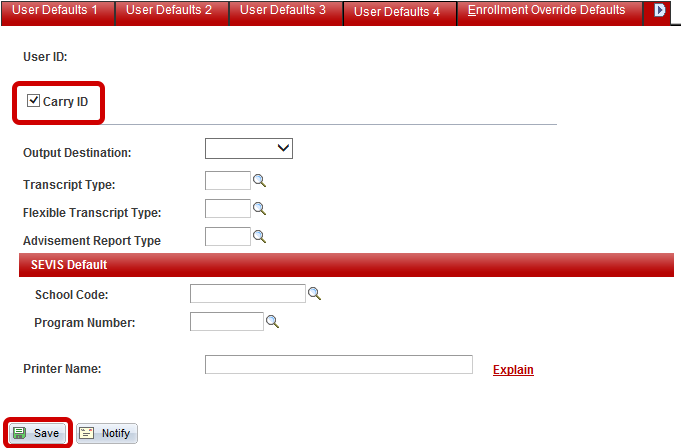
Click on the User Defaults 4 tab and check the Carry ID checkbox. This allows you to move between pages without re-keying an NU ID number.
Click the Save button to save your user defaults.
 Signing Out of MyRED
Click the Sign out link to securely exit MyRED.
Always remember to Sign out before navigating to another web site or before leaving your workstation.
 Term Code Structure
All terms are assigned a four-digit code. The first digit represents the century, the second and third digits represent the calendar year and the fourth digit represents the term.
First Digit:
0 = 20th Century
1 = 21st Century
Second and Third Digit:
Represent the Calendar year, for example 10 represents 2010.
Fourth Digit:
Represents the Term
1 = Spring Term-Begins in January
5 = Summer Term-Begins in May
8 = Fall Term-Begins in August
Examples
0988 = Fall 1998
1031 = Spring 2003
1108 = Fall 2010
1135 = Summer 2013