Last Updated: July 5, 2024
Use the Registration Audit Trail to review a summary of enrollment actions on a student’s registration trail. One can determine what action was taken, when, and other course details pertaining to a student’s registration history.
1.
Once you’ve navigated to the Registration Audit page, enter the student’s NUID number in the category marked Empl ID: and indicate the term you wish to view. Click Search.
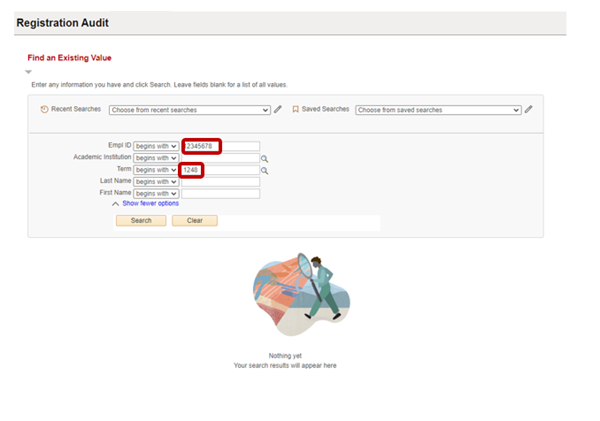
| Term: |
|---|
| If you don’t indicate the term before you click Search, a list of applicable terms to select from will appear below. |
2.
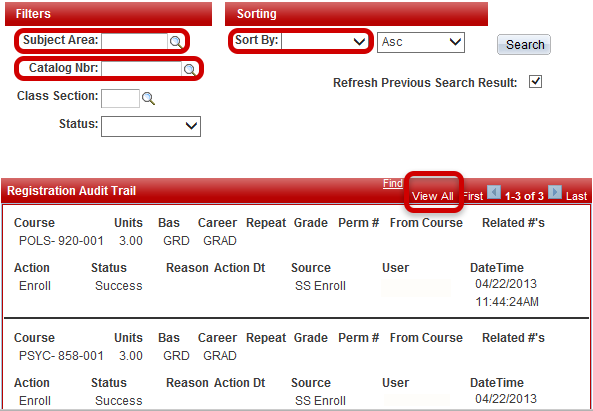
| Sort By | View All: | Subject Area and Catalog Number: |
|---|---|---|
| The viewer will show courses in the order their action was taken. For a different order, select a Sort By category. | The viewer will initially show up to 10 results. To see more, click View All. | To see a particular course, enter the Subject Area and/or Catalog Number into the Filter and click Search |
3.

| Bas: | Perm #: | Related #’s: |
|---|---|---|
| Bas refers to Grading Basis. In this case the course is taken for a grade. | If a student uses a permission code, it will appear under Perm #. | Related #’s indicates the class numbers of required course components. |
| Status: | User: | Action: |
|---|---|---|
| If a student receives an error message, it is indicated under Status. | User indicates the ID number of the person performing the action. | The following may be indicated under Action:
|
4.
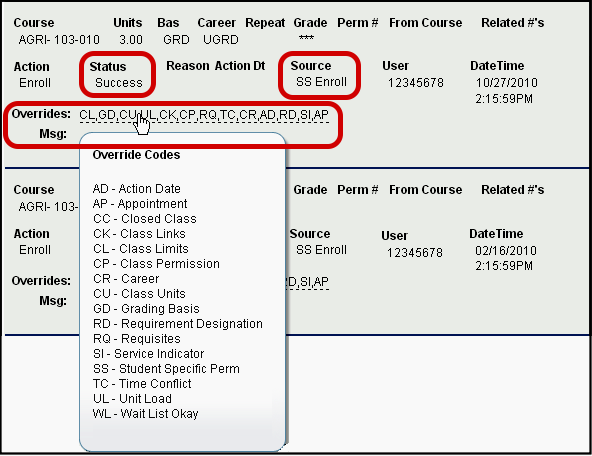
| Status: | Source: | Overrides: |
|---|---|---|
| Status will reflect the action status as a “Success”, an “Error”, or a “Message”. | Source indicates an action taken using a student’s Self Service (SS Enroll), or a staff member’s Quick Enroll. | When the Overrides field is populated, scroll over the codes to see an Override Code Key to determine the override type. |