URL: https://unl-inowweb-prd.unl.edu:8443/PerceptiveExperience/#login
User Name: NUID
Password: TrueYou password
When you first log in, the Home screen provides icons for your options within Perceptive Experience:
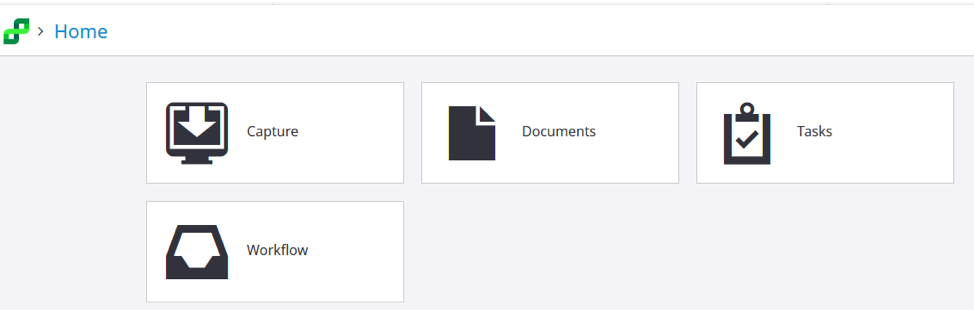
1. View a Document:
1. Click on the Document Icon
2. To search for a document, click in the Search Box. You will get a pop-up box to enter your search criteria:

3. Use the ‘Name’ Drop down box to select NUID
4. Enter an NUID in the empty box and click on Add

5. Click Search to view a list of all student’s documents.

6. Click on a document to open it.

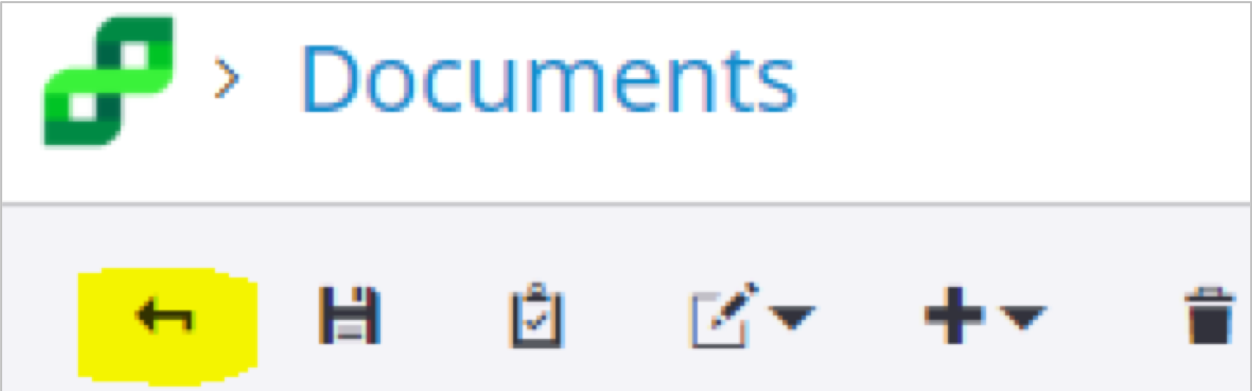
7. In the Document view, use the back arrow in the top left hand corner to return to the list of the student’s documents.
8. To search for a different student, click in the ‘NU ID starts with’ box and change the NUID, then Click Update.
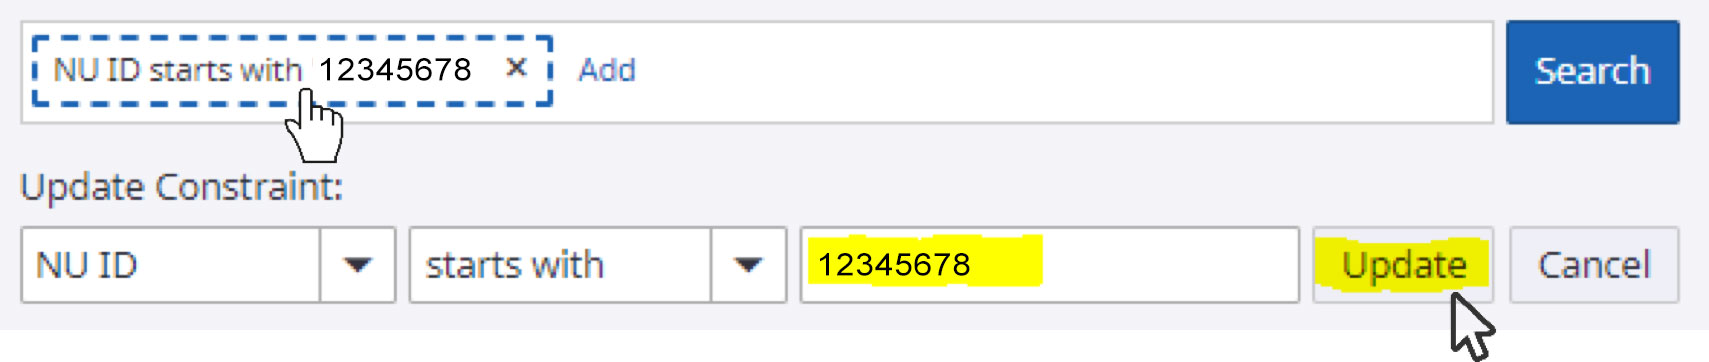
9. Click Search

10. Use the icon in the upper left hand corner of the URL to return to the main menu.
2. Review Documents in Workflow Que
1. From the Home screen, click on the Workflow Icon
2. Use the left hand menu to select the Workflow/Queue you wish to view
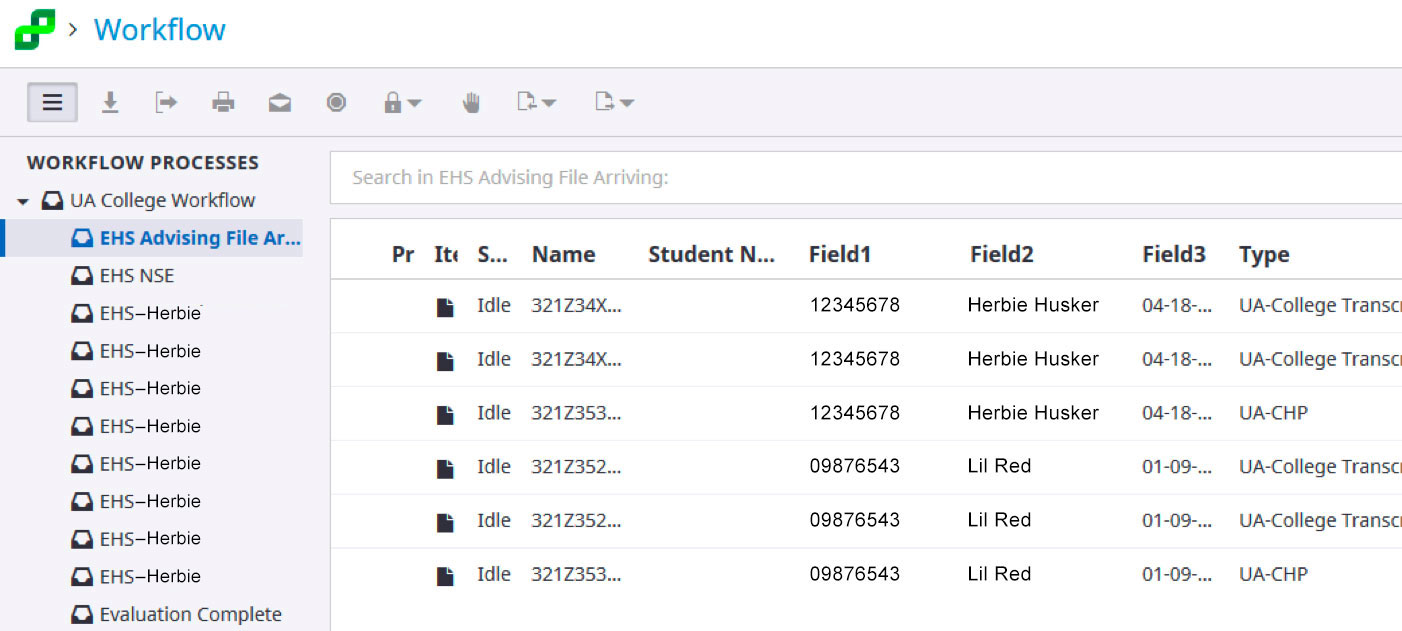
3. Click on a Document to open it.
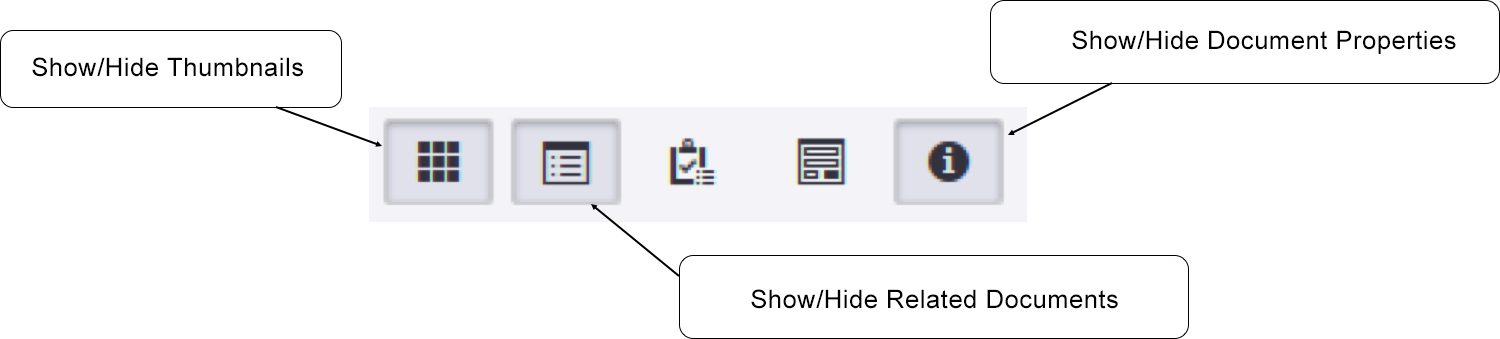
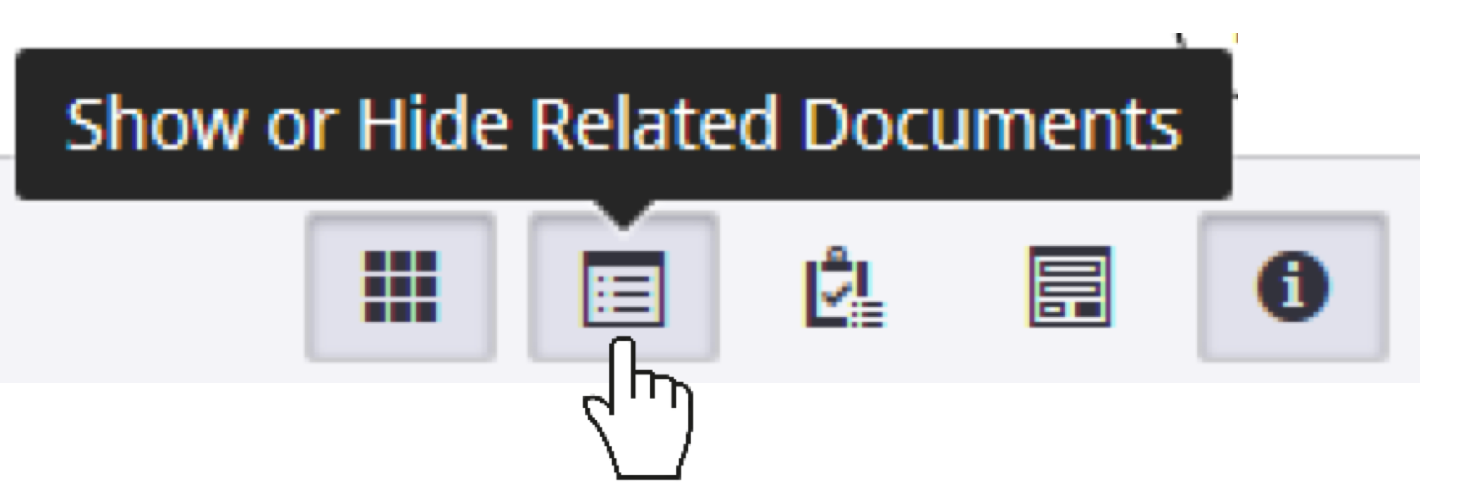
4. Use the buttons in the upper right hand corner to set your Show/Hide preferences:
- Thumbnails
- Related Documents
- Document Properties
5. To Add Annotations, click on the Annotation Icon at the top of the page and select Create Annotation.

6. Click on the document where you would like to place the annotation and select the Annotation Type and the Annotation Template, then click Add
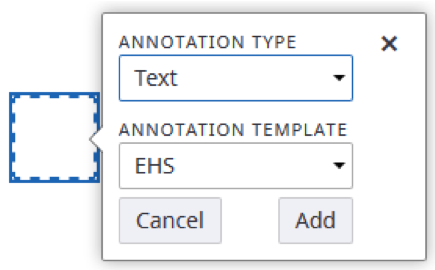
7. For the “Text” annotation, Type your desired test and click on OK.
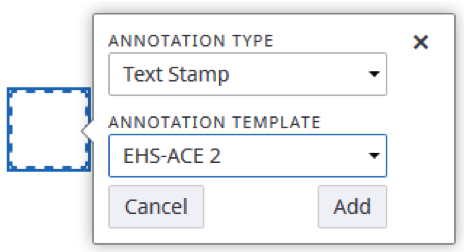
8. To Add a Stamp, click on the Annotation Icon > create Annotation.
9. Select “Text Stamp” and the desired Annotation Template and click Add.
10. Use the back arrow icon to return to your workflow queue.
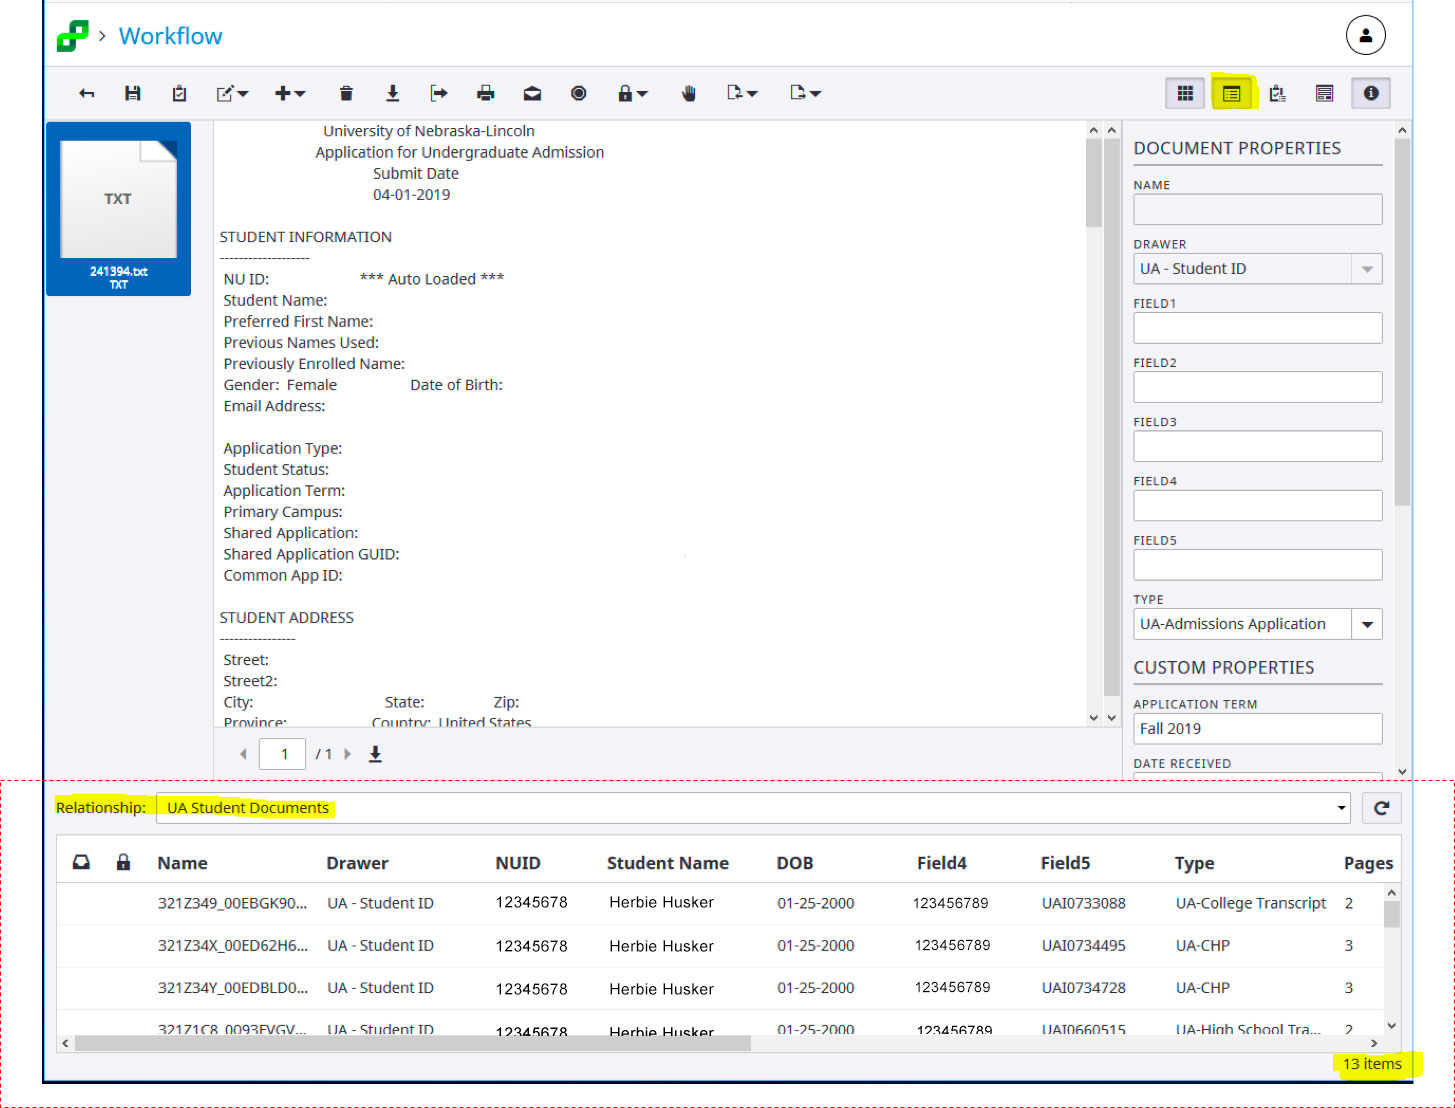
3. Viewing Related Documents (takes the place of viewing documents in a ‘folder’)
Viewing documents within a student’s file will no longer take place within a “folder”. If you want to view additional documents in a student’s file you can select the ‘Show Related Documents’ icon in order to view the student’s files.
**NOTE: The Admissions Office will no longer route a student’s folder once they have been admitted. Instead, the student’s application (Document Type of “UA-Admissions Application” or “UA International Application”) will now be routed to the appropriate advising queue. You will then be able to view additional documents within the student’s file by selecting to view related documents.
1. Click to open a document.

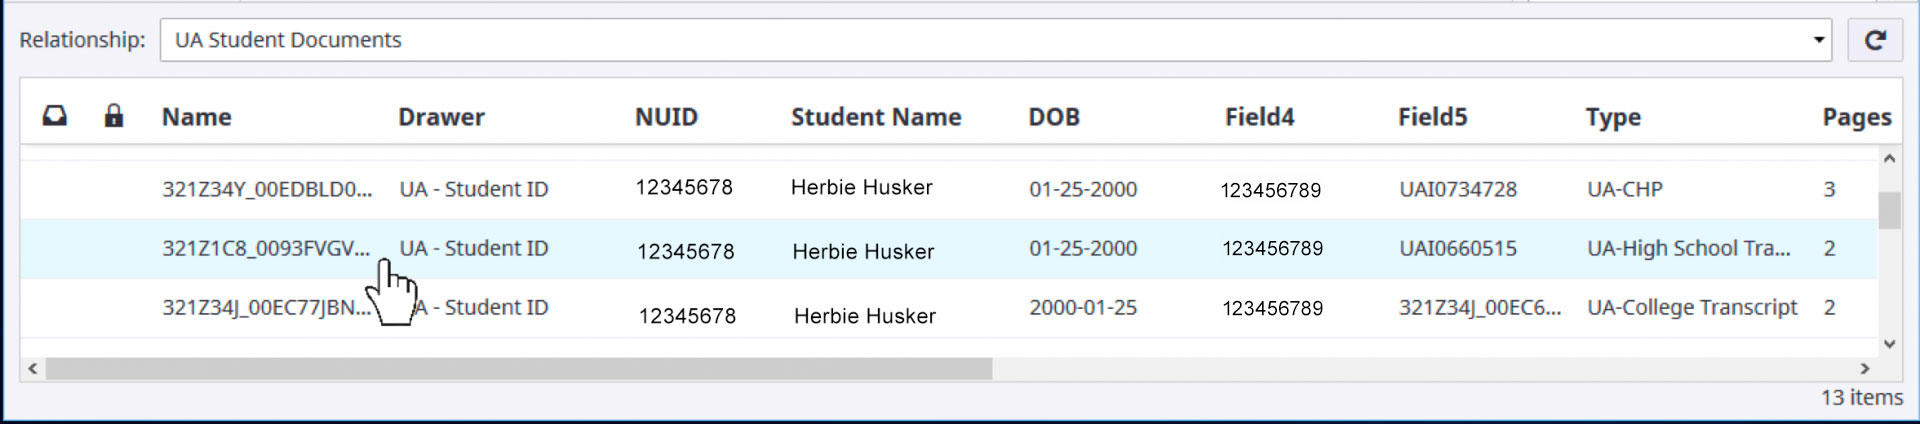
2. Select the “Show Related Documents” icon. A relationship window opens at the bottom of your document window where you can view and select documents in the students file.
3. Clicking on a document in the Related Documents window will open the associated document in a separate window (this will require disabling pop-up blocker).
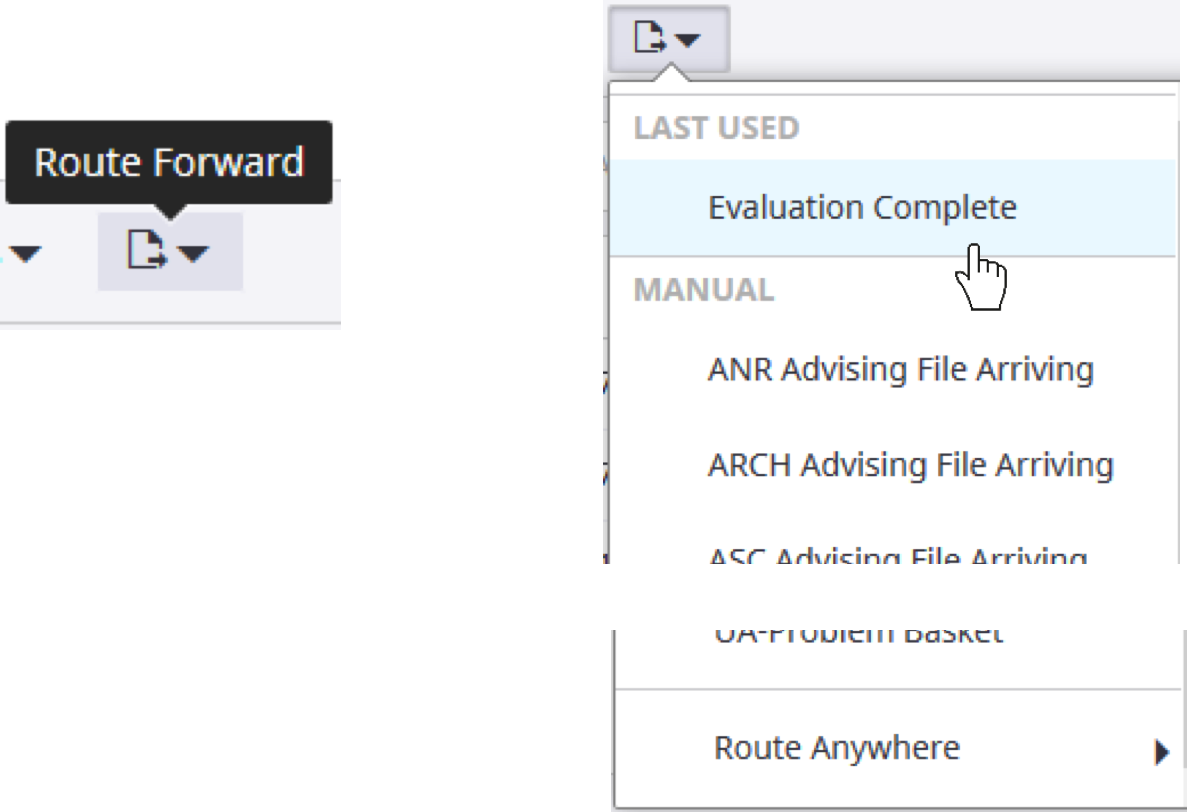
4. To Route a Document in Workflow:
1. Route Forward/Route Anywhere: Click the Route Forward Icon at the top of the page. Use the drop down box to select a workflow queue to route the document (Route Anywhere option is in the dropdown.)
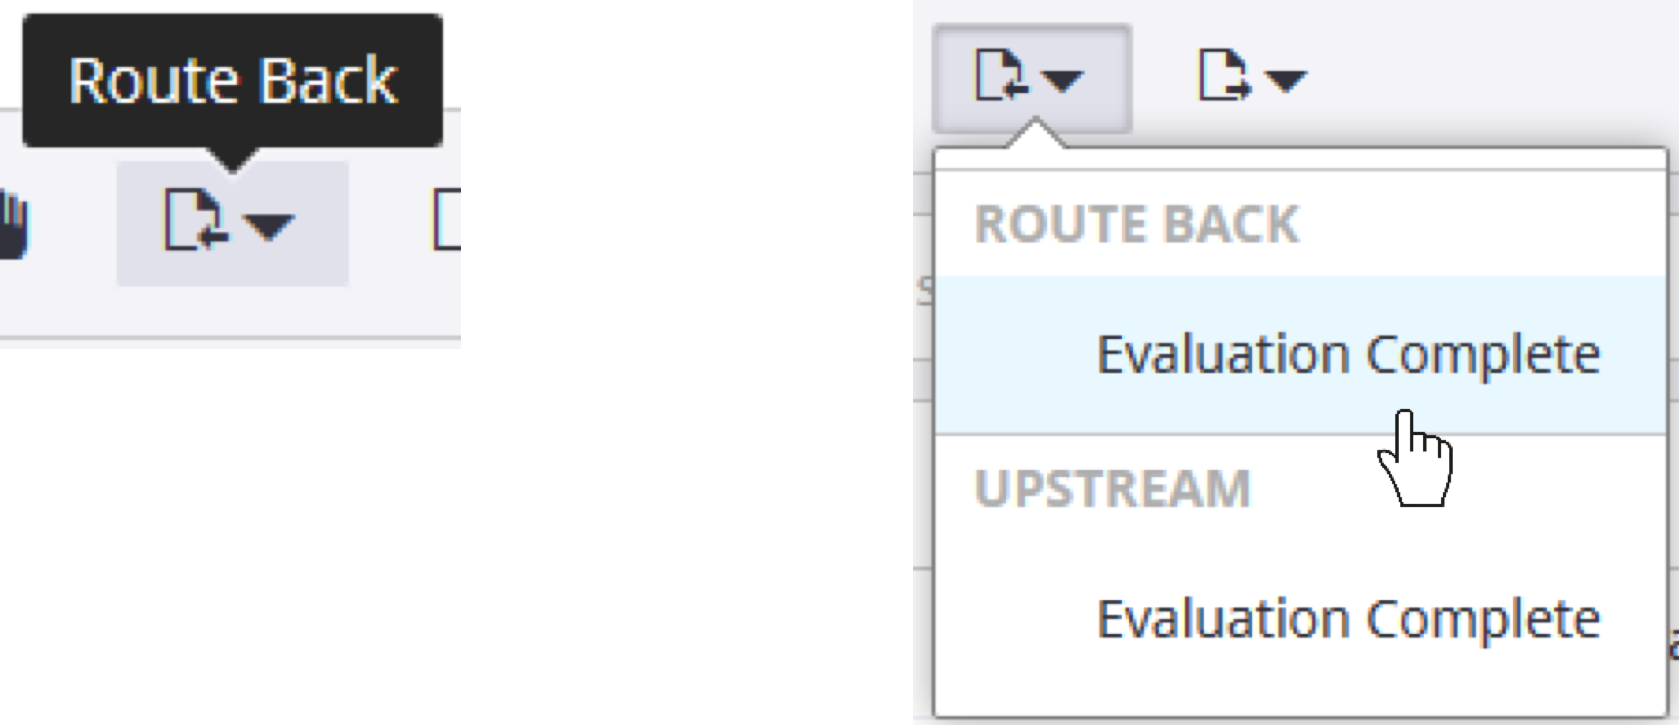
2. Route Back/Route Upstream: Click the Route Back Icon at the top of the page. Use the drop down box to select the workflow queue to route the document back to (Route Upstream option is in the dropdown.)