Log into the CLSS website using your UNL credentials.
- All class active schedules are rolled from term to term. Example: Fall 2018 becomes Fall 2019 schedule. Cancelled sections are not rolled from term to term.
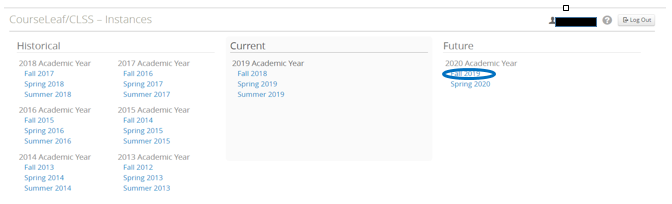
- CLSS refers to terms as Instances.
- Departments are able to edit upcoming and the current schedules according to the schedule available at: https://registrar.unl.edu/faculty-staff/CLSS/calendar/.
Choose the instance to edit or create a section.
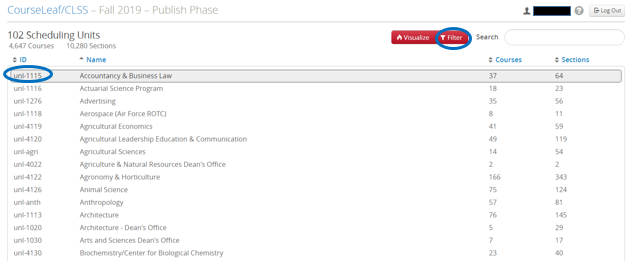
Choose the Unit ID or Filter for the sections to edit. The Search bar will search within the listed IDs or the listed Scheduling Unit Names, it will not search for particular classes or subject codes.
The screen will open to the courses and sections currently scheduled.
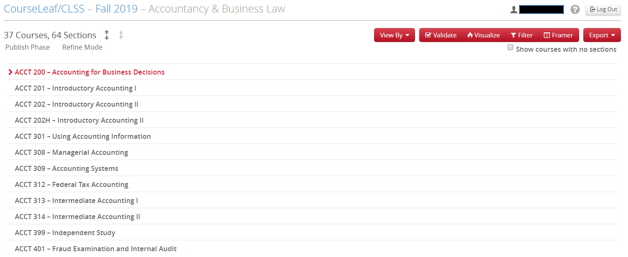
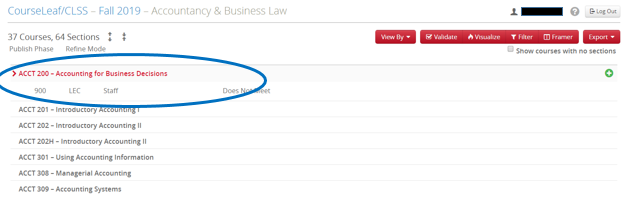
This can be expanded by clicking on the arrows.

OR double-clicking on an individual course will show all sections for that course.
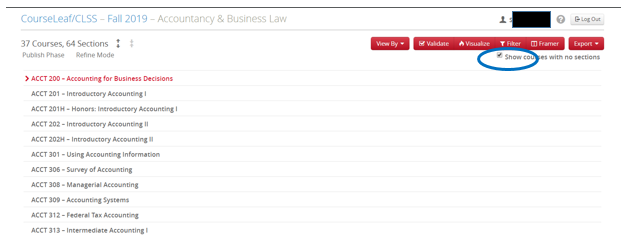
If you need to create a section for a course that currently has no sections, click the checkbox next to Show courses with no sections, underneath the red buttons. In the example below, ACCT 306 is now visible.
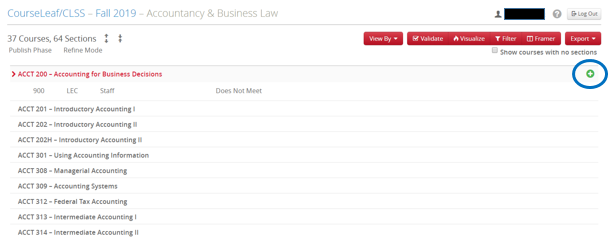
The individual sections can be edited by double-clicking on them OR create a new section by clicking on the + sign. This will automatically create a section in the next number sequence to edit for publishing.
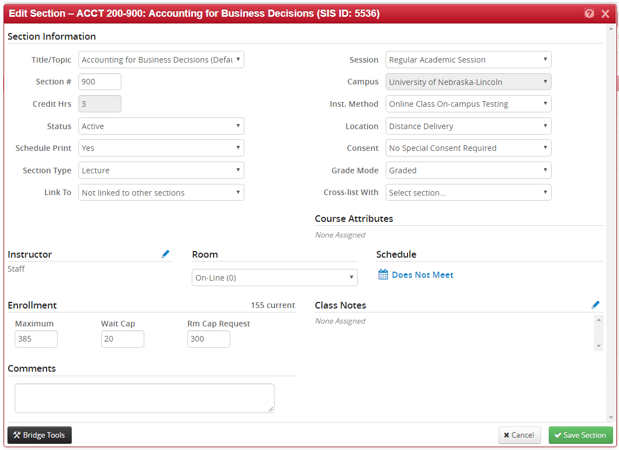
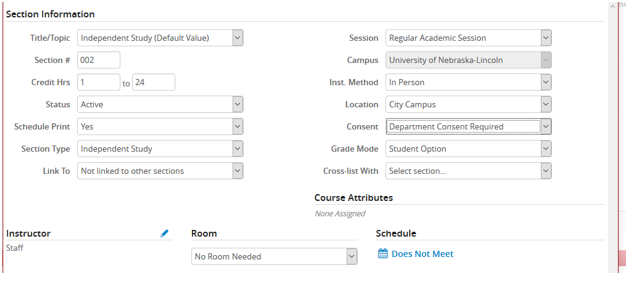
After selecting a section or creating a new section, the editor can edit most areas of a section. If a section is cross-listed, only the home department can edit areas effecting all sections such as total cross-listed enrollment.
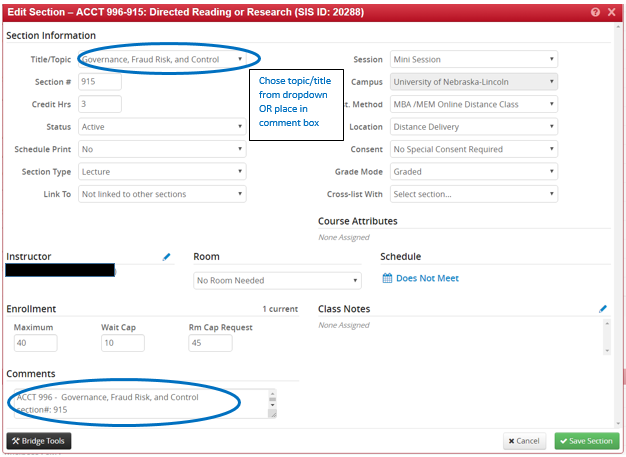
Title/Topic: Sections can have a separate title/topic. If this topic has been offered previously, select it from the dropdown. If it is not in the dropdown place in the comments. Example: Add topic: Governance, Fraud Risk, and Control. Refer to Changing Title-Topic tutorial.
Section # - This number can be changed to reflect how the section is being delivered and what session it is offered. It is always a 3 digit number. Refer to class numbering on CLSS website page (https://registrar.unl.edu/faculty-staff/CLSS/section-numbers/) and CLSS Section Numbering tutorial.
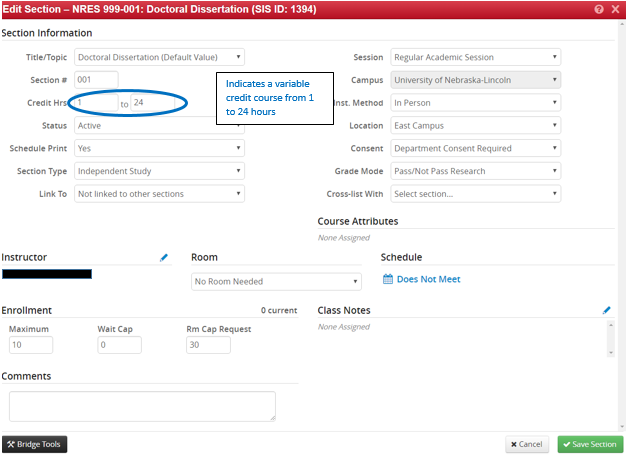
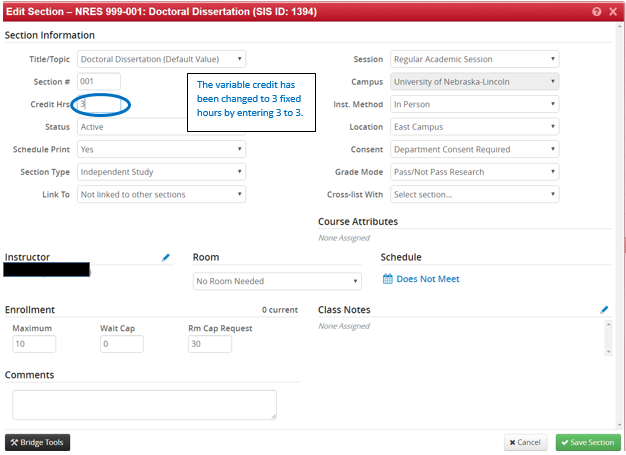
Credit Hours – If the course is fixed section, the number of credits cannot be edited. A section can be changed from variable credit to fixed credit or to a different variable within the overall variable hours. To change to fixed enter the number of credits in both boxes. Example course was 1 to 24 credit hours and is changed to 3 hours. Enter 3 to 3. Refer to Changing Variable Credit tutorial.
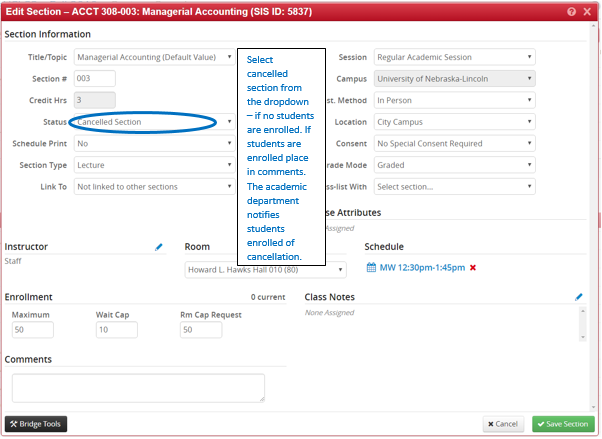
Status - Select active or cancelled section. Selecting cancelled section can only be completed if no students are enrolled. If students are enrolled, indicate to cancel the section in the comments area and change the maximum enrollment to zero. It is the department responsibility to notify all students enrolled. If a section is cross-listed and cancellation is indicated, all sections in the cross-listing will be cancelled unless otherwise indicated in the comments area. Refer to Cancellations tutorial.

Schedule print – This indicates if a section is visible by students in the class schedule.
No - Hides the section from the public.
Yes – The section is visible to the public.
All – Not a valid value. Do not select this option.
Section Type: Select the appropriate section type. If the appropriate type is not able to be selected indicate in the comments area. Common selections include: activity, field studies, independent study, internship, laboratory, lecture, professional skill development, quiz, recitation, seminar and studio. If unable to select appropriate section type, enter section type in comments.
Link To: Recitations, labs and studios can be linked to lectures. Select from the dropdown the lecture to link to the recitation, lab or studio. Refer to Cross-listings and Related Component Sections tutorial.

Session: A section can be offered in various sessions within a term. Fall and spring terms have 2 sessions: mini and regular session. All non-standard dates are considered mini sessions. It is important that the numbering of the section be aligned to the session the section is offered. Choose the appropriate session from the drop down. If changing sessions after a section is created, put in comments. Dates for mini sessions can be edited in the Schedule area under Meetings or put in the comments area.
Summer:
Eight Week
First 5 Weeks
Mini Session – Used for any session that is not the defined summer session dates.
Second 5 weeks
Three weeks (Pre-session)
Fall/Spring:
Mini Session – Used for any section that does not adhere to the regular term dates.
Regular Academic Session
Campus: University of Nebraska-Lincoln is the defaulted selection.
Instructional Method: This selection determines tuition charged to the student. Select the appropriate selection for the delivery of the section. If changing after students are enrolled, the Registrar office must drop and re-enroll the students to properly have tuition calculated and assessed.
Contract Classes
Field Class
In Person
MBA/MEM Online Distance Class
Nebraska Now In-Person Class
Nebraska Now Online Class
Online Class On-Campus Testing
Online Distance Class
Location: Select the appropriate selection for the location of the section. This also assists students when filtering the class schedule when registering.
Cedar Point Research Center
City Campus
Distance Delivery
East Campus
Nebraska Innovation Campus
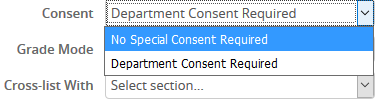
Consent: To help control enrollment, departments have the option of applying consent to sections of their courses.
When consent is required, this means that the student enrolling must have a permission code from the department overriding department consent, or the department has the option to fill out a schedule adjustment form for the student.
To add or remove consent from a section:
On the section editor window, find the Consent drop down box.
Use the drop down menu to change it to either No Special Consent Required or Department Consent Required to fit your section needs.
Once the selection has been made, save section and initiate workflow, if applicable.

Refer to Adding and Removing Department Consent tutorial.
Grade Mode: The grading basis for the course defaults to what was approved and listed in the course catalog. If the grading basis for a class is Student Option, editors have the option to fix the grading basis for that particular section and for that particular term. If the Grade Mode box is grayed out, then the grading basis cannot be changed or the instance is in a limited changes phase. To view our curriculum online, visit https://nextcatalog.unl.edu/courseadmin/. In this case, please follow the same procedure as listed on the Limited Changes documentation.
Grading Basis Options
The Grade Mode drop down box is located on the upper portion of the section editing window. Click on the box to view the drop-down options.
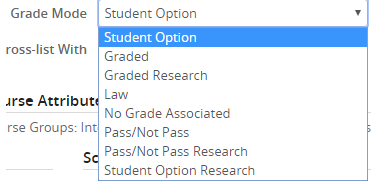
The Student Option grading basis settings allow registering students to pick whether they are given a letter grade (Graded) or given a Pass/Not Pass grade (Pass/Not Pass). Graded Research, Pass/Not Pass Research and Student Option Research options are used only by 899 and 999 graduate level courses. Law is reserved for Law courses only. No Grade Associated should not be used.
Best Practices when Updating Grading Basis
It is highly recommended that any grading basis changes be done before student enrollment. This way, students are given the appropriate options (or no options) when enrolling. Grading basis changes can be made after students are enrolled but can result in longer processing times. This can also cause confusion for students, please ensure the grading basis is correct ahead of enrollment as much as possible.
Once you have chosen the desired grading basis, click Save Section and initiate workflow.

* Note that new changes in curriculum are not automatically available in CLSS. Refer to Changing Grading Basis tutorial.
Cross-list with: A cross-listed section cannot be chosen from this field. Indicate in the comments box the section to cross-list with. After the cross-list is created by the Registrar’s office, it will be displayed in the cross-list area. See Cross-list and combined tutorial.
A purple ribbon at the top indicates that in the example below ENGL 315B-001 is the controlling section. The controlling section controls the total cross-list enrollment, meeting pattern and instructor. Refer to Cross-listing and Related Component Sections tutorial.

Instructor changes: To edit instructor, click on the pencil icon just to the right of Instructor. An instructor can be removed by clicking the trash icon. Add an instructor by clicking the (+), use the dropdown box and select Other. This allows to search by instructors name or NUID. Once the instructor has been added, the appropriate role and whether or not to print the instructor’s name in the schedule can be chosen. When all changes are done, click Accept to save.
To Add an Instructor
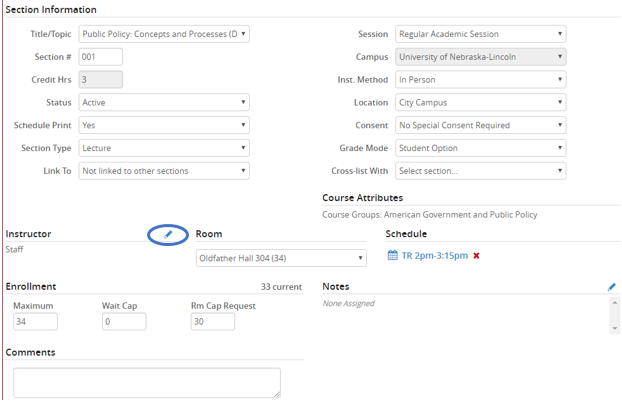
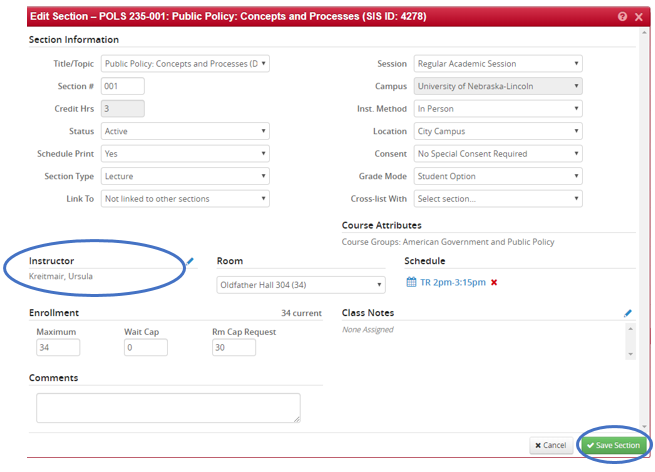
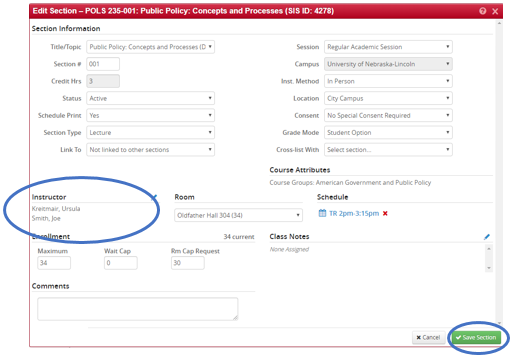
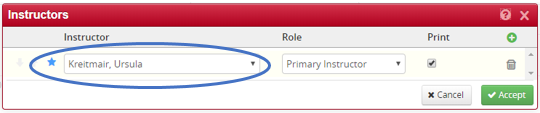
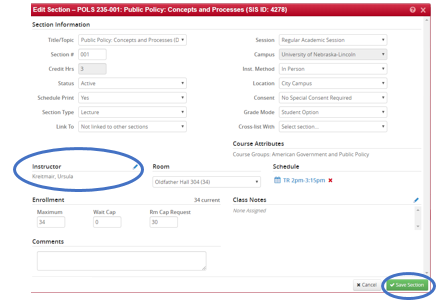
Upon opening the section editor window, it will look similar to the below image.
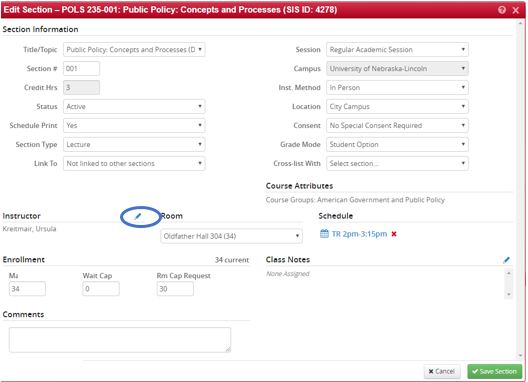
To change or add an instructor, click the pencil icon next to Instructor.
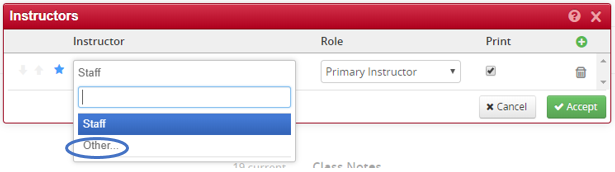
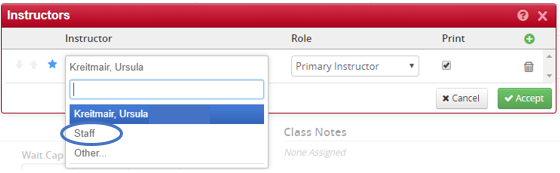
After clicking the pencil, a small window should appear. Click the drop down box under the Instructor heading and select Other.
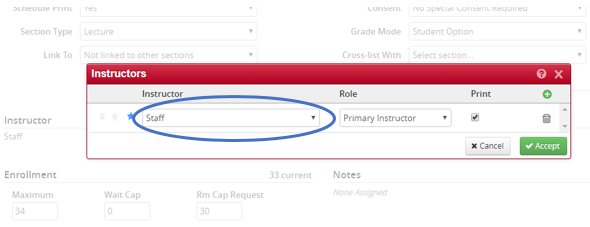
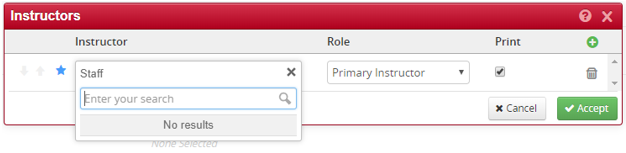
Search for the instructor by name or NUID. We suggest using NUID to find an instructor, all instructors listed in the student information system will be available to search, and not just those within your college or department.
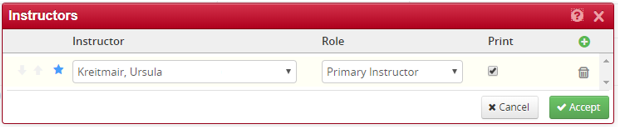
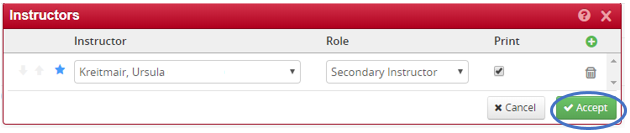
Once an instructor is found, do not forget to ensure they have the appropriate role assigned to them as well as whether their name should be printed in the class schedule.
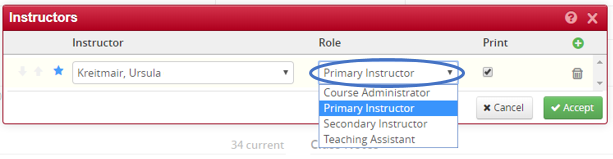
To change the Role for an Instructor: click on the drop down box and choose the appropriate option. The options listed are: Course Administrator, Primary Instructor, Secondary Instructor, and Teaching Assistant.
The Print check box refers to whether the instructor’s name is listed in the class schedule or hidden from the class schedule. When the box is checked, anyone who searches this class section will be able to see the instructor. When the box is NOT checked, anyone who searches this class section will NOT be able to see the instructor.


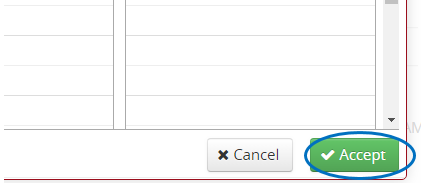
To save changes, click the Accept button.
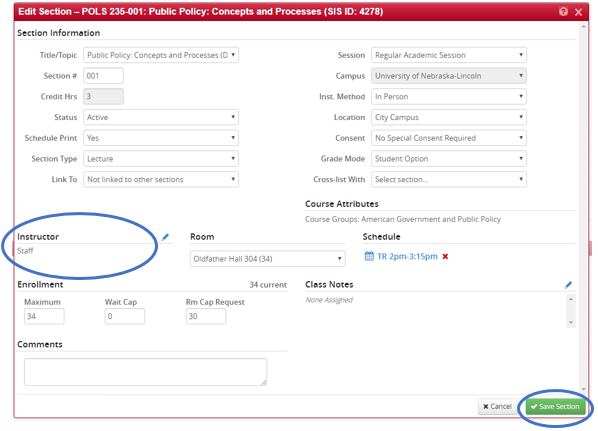
Instructor changes can now be seen on the section editing screen. Once all changes have been made, click Save Section to save and initiate workflow.
Changing or Switching an Instructor
To change or switch an instructor from one person to another person, repeat the above listed steps, searching and selecting the appropriate replacement instructor.
How to Add Multiple Instructors
Some sections require multiple instructors or multiple people who have access to the course. This can be done by opening the Instructors editing window, as described above. Once it is open, click the green plus sign in the right corner of the box.

This will create a new row for a new instructor listing.
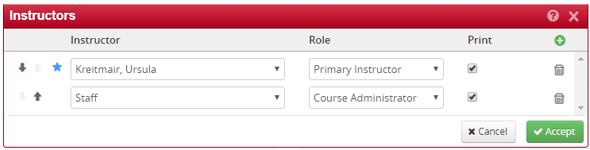
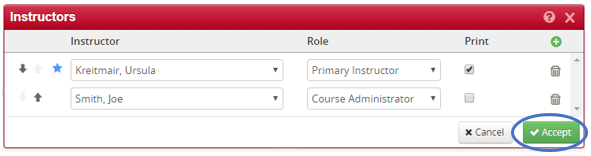
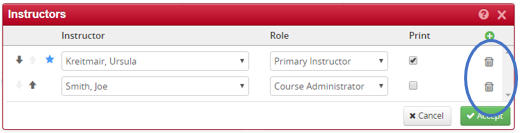
Proceed to repeat the same steps as before with this row to input the appropriate instructor, Role, and whether or not the instructor is printed in the class schedule. There is currently an unlimited number of instructors or persons that can be added to a class section.
To the left of the instructors listed, is a blue star icon. The blue star next to an instructor indicates that instructor is the lead instructor of the class. When the class is in person, the blue star indicates that the instructor is physically in the class. This is helpful to identify potential instructor conflicts or to adjust meeting patterns for classes. For more information, check out the Meeting Patterns tutorial. There can only be one person next to the Blue Star, and should be the instructor that will be teaching the course.

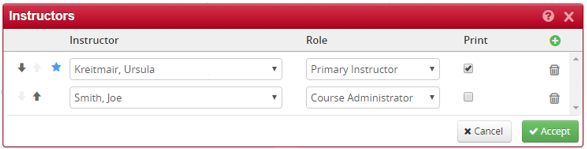
Once everything is set appropriately, click Accept. All listed instructors will display in the main section editing window. Save changes and initiate workflow, if applicable.
How to Remove Instructors
Removing instructors follows similar steps to Adding an Instructor. Find the appropriate class section and click the Pencil icon to the right of the Instructor section.
*Complete the same steps if there is more than one instructor listed to initiate the desired changes.*
Removing an Instructor from a Single Instructor Section
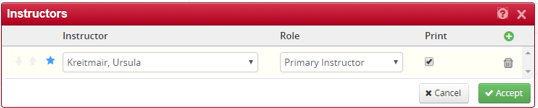
Click the drop down box under Instructor.
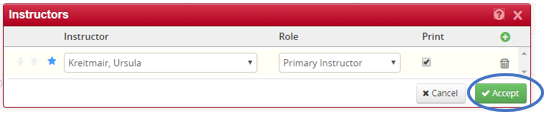
To remove an instructor from a section that only has one listed, change the drop down from the listed instructor to Staff. There must always be something listed, so select Staff to indicate no instructor assigned.
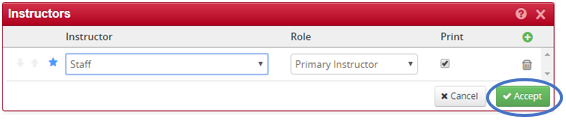
Once Staff has been selected, click Accept. Click Save Section and initiate workflow.
Removing Instructors from a Section with Multiple Instructors
If there are multiple instructors listed, it is quite simple to remove one or more from the section.
Follow the same steps as before, opening the appropriate section and clicking the blue pencil icon to bring up the smaller instructor editing window. Once this is open, notice that there is a trash can icon to the right on each row of each instructor listed.
To remove one of the instructors, click the trash can icon next to the appropriate instructor. It will remove the instructor and leave the remaining instructors. If there are more than two instructors listed, this same process follows for all except the last instructor listed. To remove the last instructor listed, follow the steps listed above for removing a single listed instructor.
To save changes, click Accept then Save Section and initiate workflow.
Help! I can’t find the instructor I need for this section when I search by NUID or by Last Name!
New hires are not immediately loaded into CLSS. If the desired instructor cannot be located, please place the instructor(s) in the Comments box. Please include:
- Full Name
- NUID
- Role
- Print or No Print
Once done, click Save Section and initiate workflow.

See tutorial Adding-Removing Instructors.
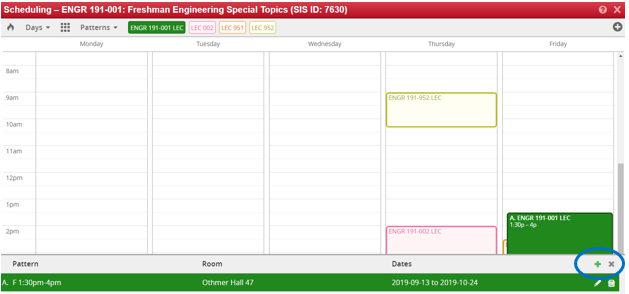
Schedule: The sections schedule will roll over from the last like term (Fall to Fall, Spring to Spring, etc.). Changes may occur if a room is removed from availability. The editor has the ability to change the meeting pattern, classroom and dates.
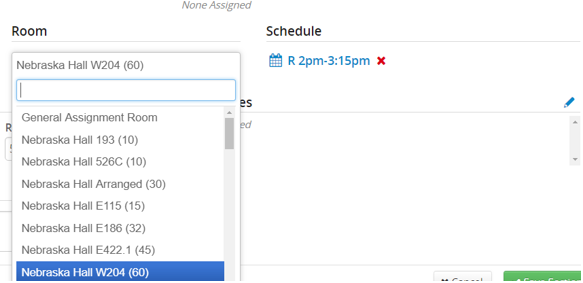
Changing classroom: The dropdown will provide department controlled room and the ability to choose general assignment. Refer to the General Purpose Classroom website (https://registrar.unl.edu/student/classroom-reservation/) for room information. If a specific general purpose classroom or a general purpose classroom in a building this can be indicated in the comments area.
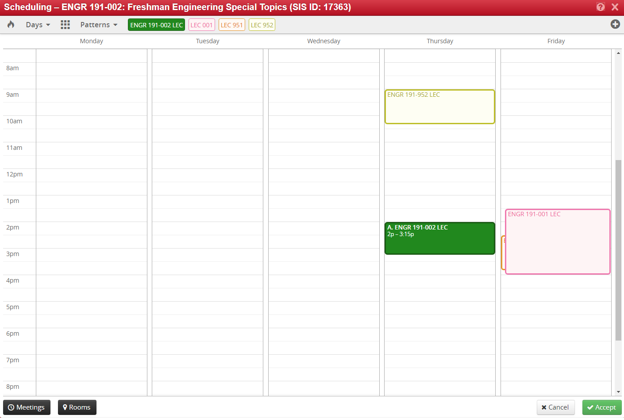
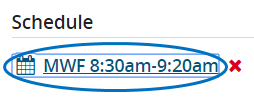
Changing or adding schedule: Click on the current schedule

This will open to the screen to edit the section meeting schedule.
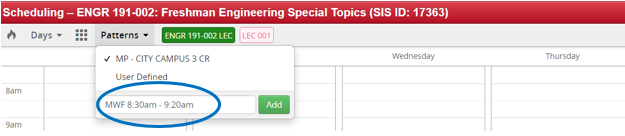
Refer to the standard meeting pattern website for assistance - https://registrar.unl.edu/faculty-staff/CLSS/meeting-patterns/.
The new meeting pattern can be entered in regular or military time. Click Add and enter the meeting days and time.
OR (MILITARY TIME)
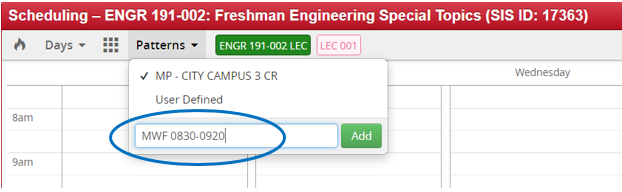
The new meeting pattern is then displayed.
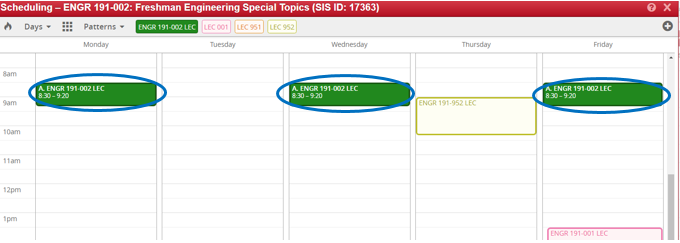
Click Accept.
The new meeting pattern is now indicated on the section.
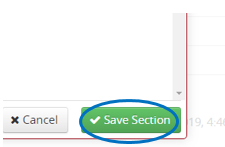
Save section.
Changing session dates: This is completed for a mini session when the session dates are not being adhered. In the schedule choose meetings.
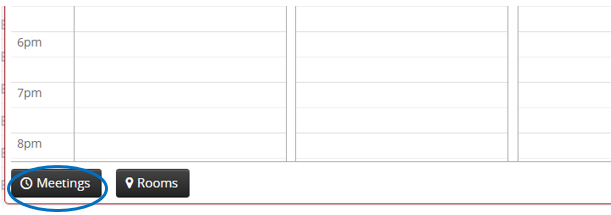
This will open up to the area to edit the section dates.
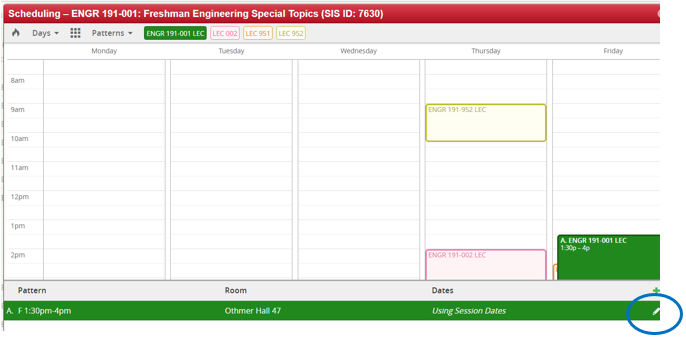
Click on the pencil to edit the meeting dates.
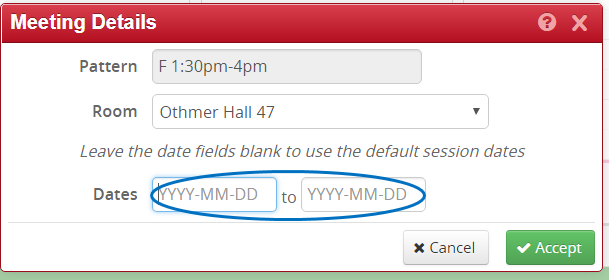
Enter the dates in the format shown
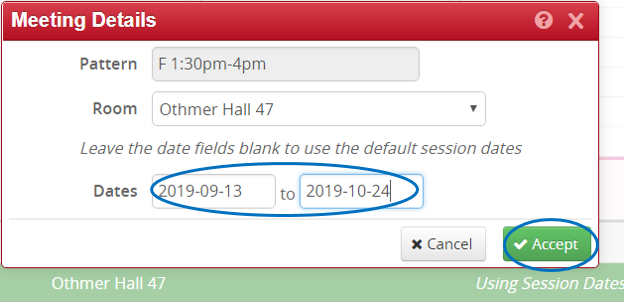
Click Accept.
The dates will now show in the meeting pattern.
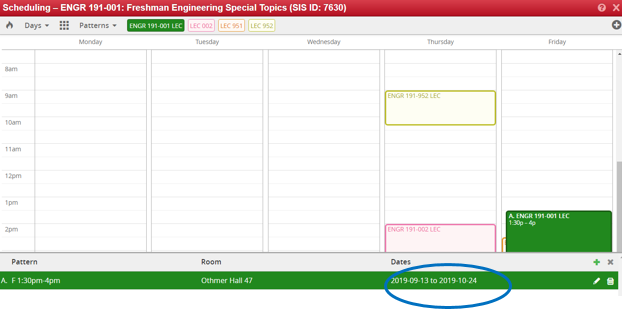
Click the small “x”
Click Accept.
Save the section
The dates can also be entered into the comments area if they are outside the term dates.
Refer to Meeting Pattern tutorial.
Enrollment: Enrollment and Waitlist caps must be set for all sections. There are a few things to note when inputting these caps in CLSS.
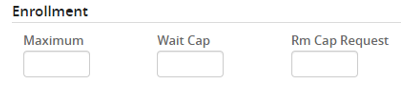
First, note that there are 3 boxes for all sections that are not cross-listed, as pictured below. If you need help with cross-listed caps, please see our Cross-listed/Combined tutorial documentation.
The Maximum box is for the total number of students that can enroll in that section. The Wait Cap box is for the number of spots desired on the waitlist. The Rm (Room) Cap Request box is for the room capacity.
Best Practices for Caps
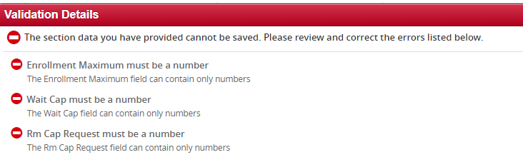
Every box must be filled, even if you do not want there to be any available spots. If no spots are desired please enter a zero. If any of the boxes are not filled when submitting the section to workflow, an error will occur requesting input.
Maximum Enrollment Box
The Maximum box should contain the total number of students allowed to register for the section. The number in this box should also consider the room the class will be held in. For example, if the room requested fits 24 people, then the Maximum box number should be 24 or less. This particularly comes into effect when dealing with General Purpose rooms. Please refer to our General Purpose documentation for more information.
If it is desired to keep the section active, but control who enrolls, place a zero in the Maximum box. This means that students attempting to enroll will receive an error message stating that the section is closed. Student can only by registered with a Schedule Adjustment form or by a Permission Code overriding a closed class.
Changing the Maximum number after students have enrolled will not affect the currently enrolled students. Any desired adds or drops need to be done with the proper documentation.
Wait Cap Enrollment Box
The Wait Cap box is designed to set up a waitlist for the section. A waitlist is not mandatory, but a number must be entered. If there is no waitlist for the class, enter zero.
If a waitlist is desired, place the desired number of held spots in the box. For more information on how waitlists work, please visit our Waitlist Documentation.
Room Cap Request Box
It is important to note that this box does not control any enrollment for students. It is simply there for informational purposes. Therefore, the Room Cap Request box will most likely be the same number as your Maximum enrollment box. However, it may differ if you are working in with Cross-listed Sections, or are holding spots for NSE. In these cases, the Room Cap Request Box may differ.
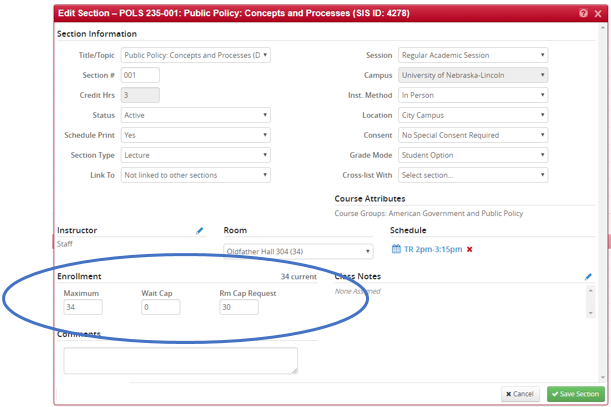
As pictured above, the Maximum enrollment box is set at 34 and the Rm Cap Request box is set at 30. There is 34 students registered due to the Room Cap box not controlling the number of students that can register. The Maximum box controls enrollment numbers.
Room Cap Request is mostly used for General Purpose Classroom Scheduling. Refer to General Purpose Classroom Scheduling tutorial and/or to Enrollment Caps and Waitlist Caps tutorial.
Class Notes – Class notes are used to convey information to students regarding information specific to a section. Class notes may also be approved course fees to charge for the section.
Class notes are to be used from term to term and various classes. Specific dates, names, etc. are not to be used as they are not transferrable from term to term.
Notes are picky! They must be the exact character usage as what is in MyRed. Refer to the Class Notes pdf or excel file on the CLSS website https://registrar.unl.edu/faculty-staff/CLSS/class-notes/. Copy and paste to get exact character usage.
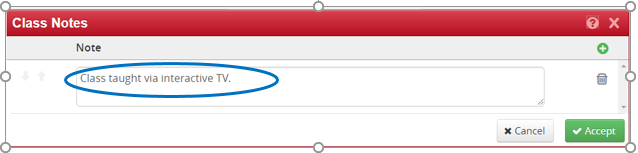
Click the pencil icon to the right of Class Notes.

Click + to add a class note.
Use the Search bar to find a class note.
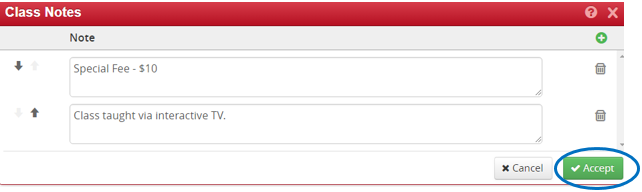
Multiple class notes can be added to a section by clicking on the +.
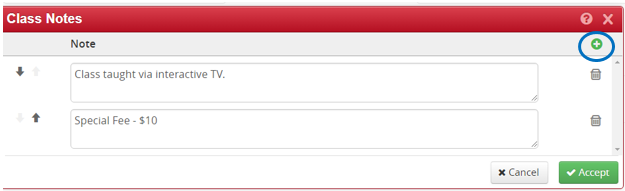
Multiple notes can be reorder in the sequence by using the arrows.

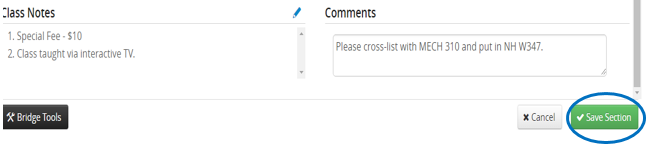
Once edits have been made, click Accept. The main class section editing screen will appear with the listed class notes.
To save all changes for the section, click Save Section and initiate workflow.
Delete a class note by clicking on the trash can icon to the right of the note.
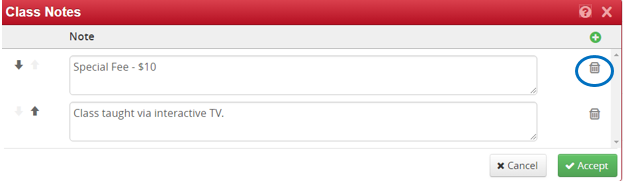
Once edits have been made, click Accept.

To save all changes for the section, click Save Section and initiate workflow.

Refer to Class Notes tutorial.
Comments: The comments box is a general information concerning a specific section. This information is not visible to the general public.
Examples of use of the comments box:
- Adding a cross-listing
- Any edits that the editor is unable to make to a section. Such as Changing sessions, instruction mode, grading, etc.
- Cancellations of a course with enrollment.
- General Purpose classroom requests.
- Mini session dates that are outside the session dates.