This video will show you how. Written instructions with pictures are provided below the video.
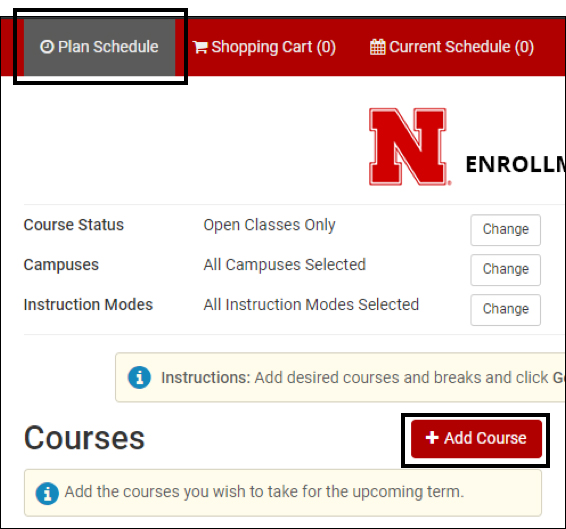
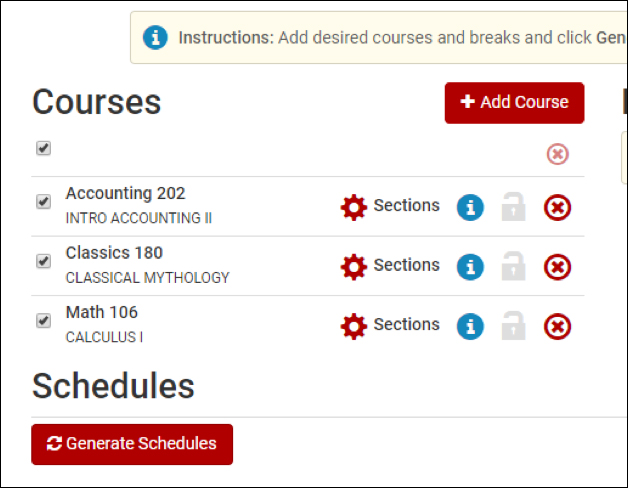
Click Add Course on the Plan Schedule page.
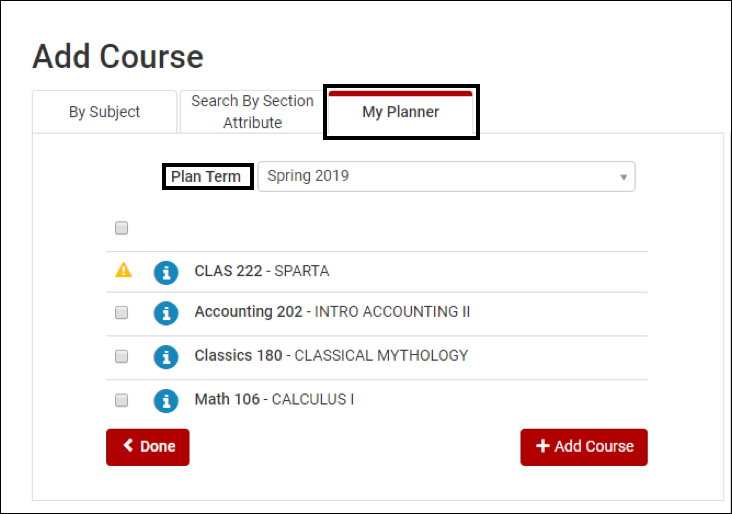
Click My Planner, and then choose the intended term. The classes that you have picked from your My Degree Planner will show up here.
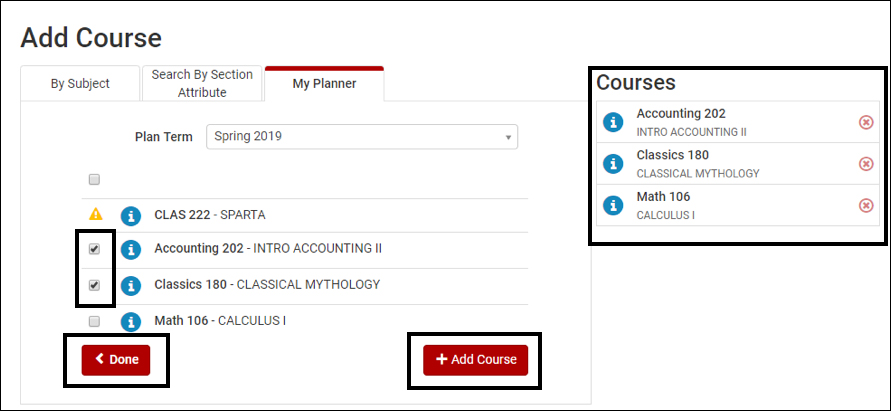
Check the box of the courses you would like to enroll into, and click the Add Course button. The checked courses will show up on the right-hand side. Click the Done button.
The checked courses will now appear on the Plan Schedule page.
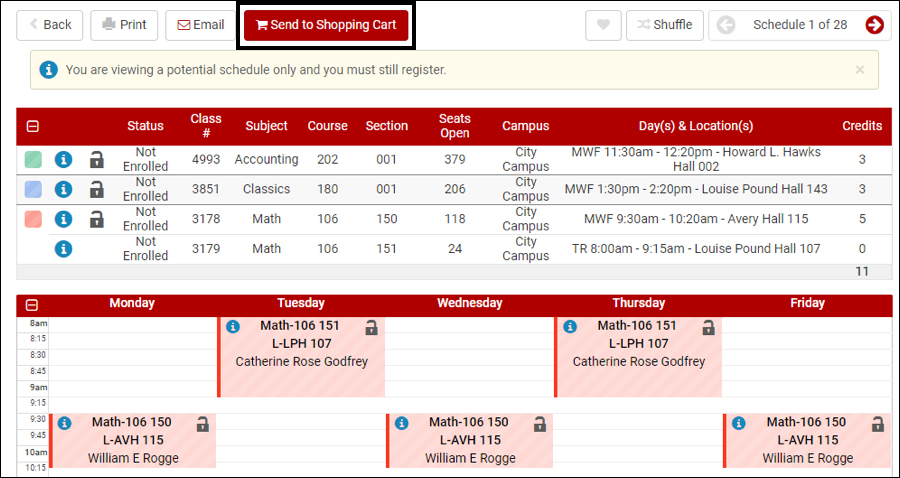
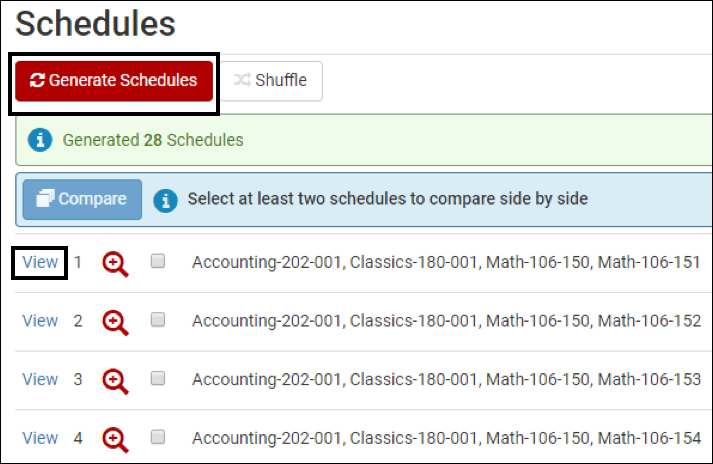
You can generate possible schedules using the Generate Schedules button. Once possible schedules are generated, you can view and choose your most desired schedule.
Once you have chosen your preferred schedule, click Send to Shopping Cart.