Adding Courses to Stellic Scheduler
Stellic's enrollment starts by adding courses to a plan either in the Planner or in the Scheduler. This tutorial covers the Scheduler.
A Note on Planned vs Unplanned Course Adds
If you have already planned your schedule in Stellic using the Planner page (tutorial coming soon) then those courses will come through when you get to the Scheduler page (see how to navigate using our tutorial at https://registrar.unl.edu/class-registration-tutorials/accessing-stellic-scheduler/). You then can generate a schedule (tutorial coming soon) if you would like Stellic to provide you with options, or, you can choose specific courses using the steps below.
If you have not previously planned your schedule using the Planner page, you will need to add courses to your plan using one of the below methods prior to enrolling (see our tutorial on how to enroll in courses using Stellic at https://registrar.unl.edu/class-registration-tutorials/enrolling-courses-stellic-scheduler/).
Adding a Course
There are two ways to add courses in Stellic Scheduler.
Adding a Course using 'Search Courses'
On the left-hand panel titled My Courses, click the '+' sign and select Search Courses.

This will open a panel on the right with a search bar and several filters. For more information on the filters, check out our Stellic Scheduler Filter Overview (coming soon). *Note: If you cannot find course, review and adjust your filters. If you still have trouble, contact your Academic Advisor.

Type the course you want to find in the Search Box. You can search by the title or by typing the subject code and/or catalog number.*NOTE*: Hidden courses require a different type of search. Please use our Registering for Hidden Courses in Stellic tutorial at https://registrar.unl.edu/class-registration-tutorials/adding-hidden-courses-stellic-scheduler/ for the exact steps on how to do so.

Scroll down the panel to find the course offering options. Select the course you want by clicking on its tile.

This will open up the Course Details. You then can click the blue Add to Plan button, or follow the directions to Select a Section.

Adding Course using 'Add Course'
On the left-hand panel titled My Courses, click the '+' sign and select Add Course.

Type the course you want to find in the Search Box. You can search by the title or by typing the subject code and/or catalog number.*NOTE*: Hidden courses require a different type of search. Please use our Registering for Hidden Courses in Stellic tutorial at https://registrar.unl.edu/class-registration-tutorials/adding-hidden-courses-stellic-scheduler/ for the exact steps on how to do so.

Select the course you want from the search results, then click the blue Add button. It will then add it to your planned courses on the left hand panel.


Your next step is to Select a Section.
Adding a Section to your Plan
Repeat either of the above processes for any additional courses you wish to enroll in. Once you have added the courses you want, you will need to select a section. You will see a warning for this listed on the page.

To select a section, click on the link select a section on the tile of the course, which will open the right-hand panel with the course details and another warning asking you to select a section.


Scroll through the right hand panel to find the section you'd like. You can click on the sections to get additional information, including text book information, instructor information, and more.

Hovering over the sections will place a preview on the calendar screen for sections that meet at a specific time and day. Online courses will be listed at the top of the calendar.
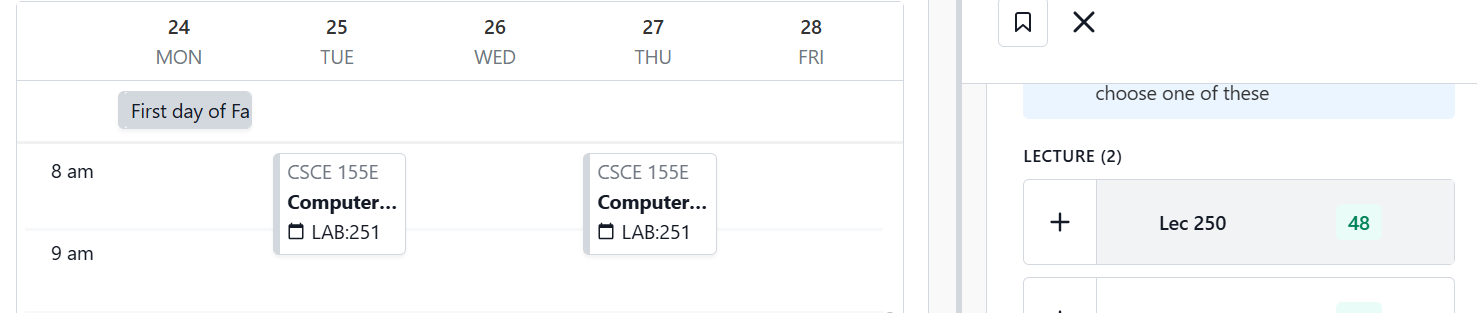
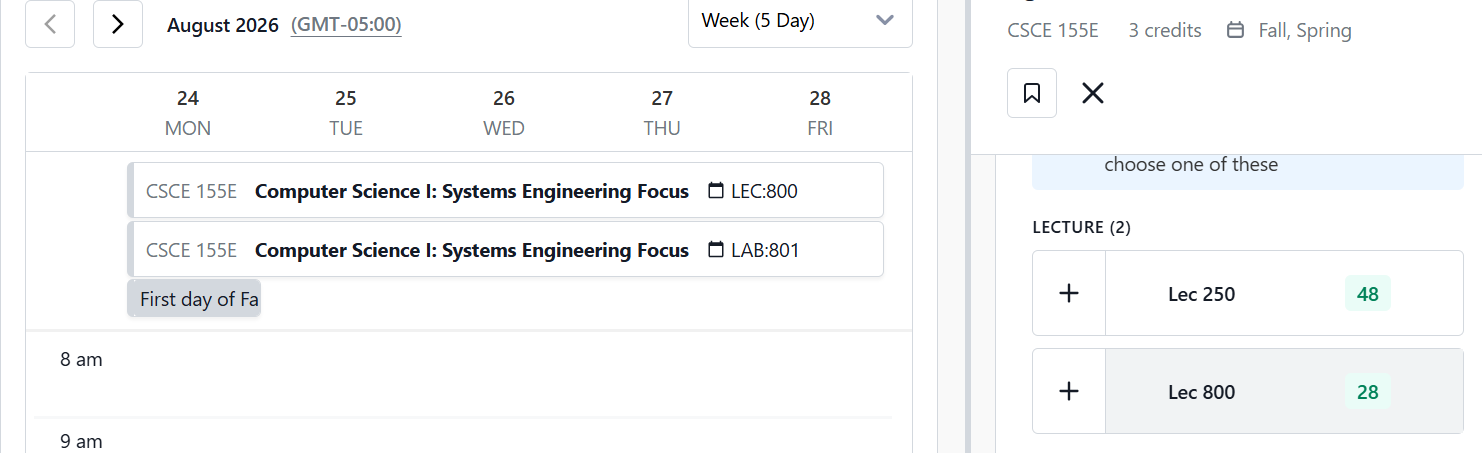
To add the desired section to your plan, click the '+' sign on the same row as the section you want.

Note: Courses with multiple components (labs and recitations) will require that both are added to your schedule. If you choose a lecture section, it will automatically pick the other component (lab or recitation) for you. If you choose the component first (lab or recitation) it will automatically put you in the appropriate lecture tied to that component. Learn how to change your components at https://registrar.unl.edu/class-registration-tutorials/changing-or-removing-planned-course-sections-stellic-scheduler/.
You will then see it populate on the left-hand My Courses panel under the Planned section and on the calendar as a tile. The tile will show the section(s) to be enrolled in. To change sections of the same class, see our tutorial at https://registrar.unl.edu/class-registration-tutorials/changing-or-removing-planned-course-sections-stellic-scheduler/.

Once all courses and sections are planned in your Scheduler, continue onto our Enrolling in Courses in Stellic Scheduler tutorial, https://registrar.unl.edu/class-registration-tutorials/enrolling-courses-stellic-scheduler/.